# AI Tools (/docs/elegantota/ai-tools)
> Use the ElegantOTA documentation from AI coding assistants through the MCP server, llms.txt and Markdown page exports.
Library: ElegantOTA
The ElegantOTA documentation is available in machine-readable formats so that AI coding assistants can answer questions and generate code from the current API instead of outdated training data.
## Ask AI
Select **Ask AI** at the bottom of any documentation page to open the documentation assistant. It searches these pages before answering and links to the sources it used. Answers are grounded in the documentation only; verify generated code against the referenced pages.
## MCP server
The documentation is served as a [Model Context Protocol](https://modelcontextprotocol.io) server over Streamable HTTP. No authentication is required. One server covers every SOFTT library (ESP-DASH, ElegantOTA, NetWizard and WebSerial); pass `library: "elegantota"` to limit results to ElegantOTA.
```text
https://docs.softt.io/api/mcp
```
The server exposes three read-only tools:
| Tool | Description |
| --- | --- |
| `search_docs` | Full-text search across the documentation. Accepts `query`, an optional `library` (`espdash`, `elegantota`, `netwizard`, `webserial` or `all`), an optional `version` for ESP-DASH (`v5`, `v4` or `all`) and `limit`. |
| `get_page` | Returns the complete Markdown of a page, such as `/docs/elegantota/ota-modes/auto`. |
| `list_pages` | Lists pages with their title, description and URL, filtered by `library` and `version`. |
### Connect a client
```bash
claude mcp add --transport http softt https://docs.softt.io/api/mcp
```
Add the server to `.cursor/mcp.json` in your project, or to `~/.cursor/mcp.json` for all projects:
```json title=".cursor/mcp.json"
{
"mcpServers": {
"softt": {
"url": "https://docs.softt.io/api/mcp"
}
}
}
```
Add the server to `.vscode/mcp.json` in your workspace:
```json title=".vscode/mcp.json"
{
"servers": {
"softt": {
"type": "http",
"url": "https://docs.softt.io/api/mcp"
}
}
}
```
Clients that support Streamable HTTP connect directly to the server URL. For clients that only support stdio, use the [`mcp-remote`](https://www.npmjs.com/package/mcp-remote) bridge:
```json
{
"softt": {
"command": "npx",
"args": ["-y", "mcp-remote", "https://docs.softt.io/api/mcp"]
}
}
```
Once connected, ask your assistant questions such as "Add ElegantOTA to my ESP32 sketch with authentication and an onEnd callback" and it will retrieve the relevant pages before writing code.
## llms.txt
The site publishes [llms.txt](https://llmstxt.org) files for tools that ingest documentation directly:
| URL | Contents |
| --- | --- |
| [`/llms.txt`](/llms.txt) | Index of every page with its title, description and link. |
| [`/llms-full.txt`](/llms-full.txt) | The complete documentation of every library and version as a single Markdown file. |
## Markdown pages
Every page is also available as Markdown:
- Append `.md` to a page URL, for example [`/docs/elegantota/ota-modes/auto.md`](/docs/elegantota/ota-modes/auto.md).
- Requests with an `Accept: text/markdown` header receive Markdown instead of HTML.
- Use **Copy Markdown** at the top of a page to copy it to the clipboard, or **Open** to send it to an assistant such as ChatGPT or Claude.
# Branding (/docs/elegantota/branding)
> Replace the logo in the ElegantOTA Pro portal with your own light and dark logos by editing the logo.h and logo.cpp library files.
Library: ElegantOTA
Availability: ElegantOTA Pro only
The ElegantOTA Pro portal serves its logo from the device. The logo is stored as byte arrays in the `logo.h` and `logo.cpp` files of the library source, so you can replace it with your product's logo without modifying any HTML or CSS, and without rebuilding the portal.
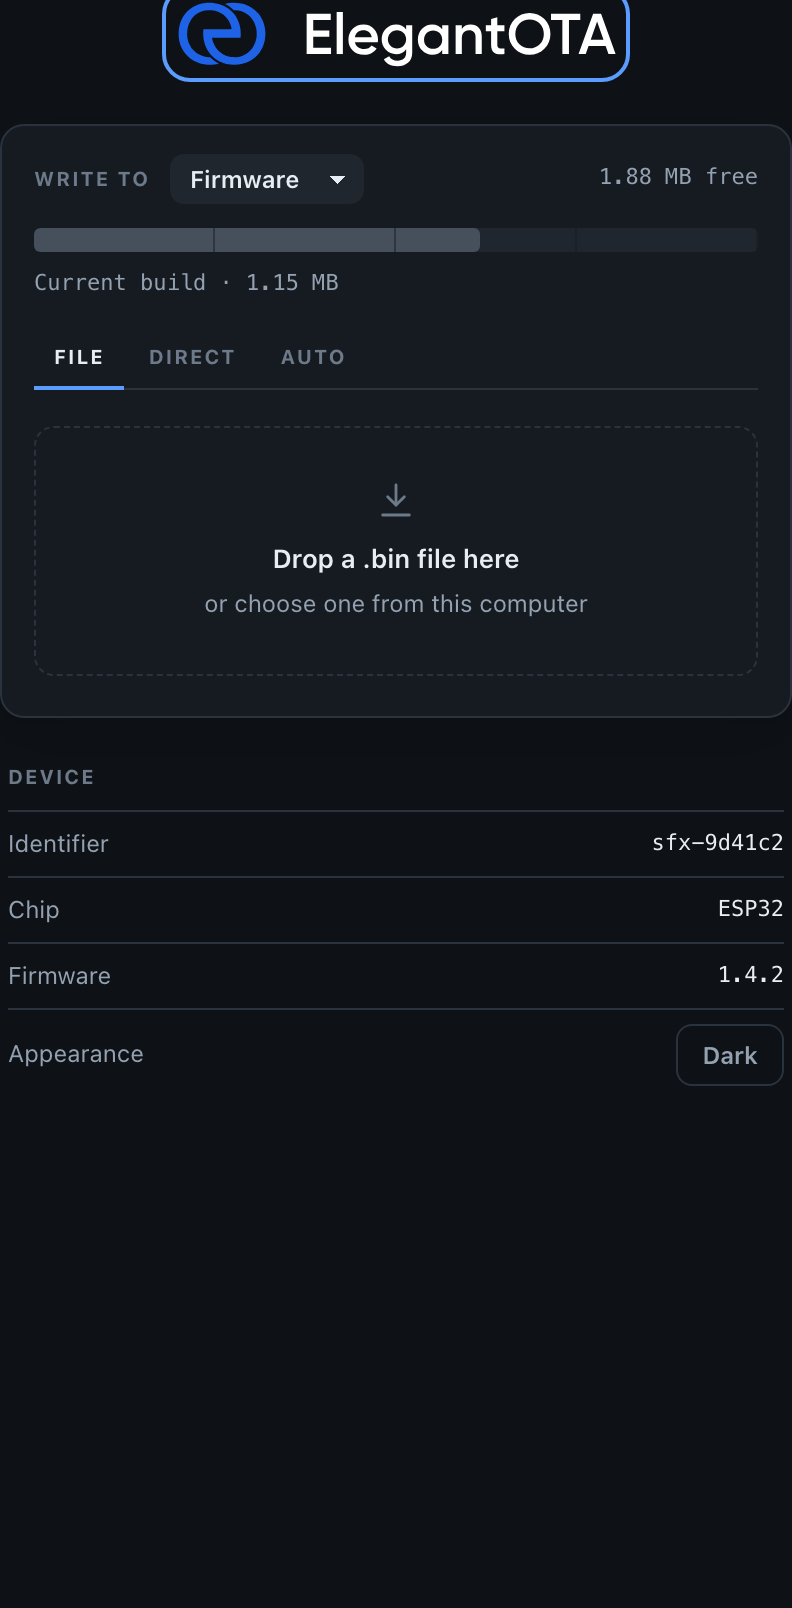
The portal requests one of two logo variants, depending on the active color scheme:
| Route | Array | Shown in |
| --- | --- | --- |
| `/ota/logo/light` | `ELEGANTOTA_LIGHT_LOGO` | Light theme |
| `/ota/logo/dark` | `ELEGANTOTA_DARK_LOGO` | Dark theme |
## Replace the logo
### Prepare the logos
Create the logo you want to display. SVG is recommended, because it stays sharp at any size and compresses well; PNG and JPEG also work. Keep the file small: it is stored in flash and sent to the browser.
Prepare one variant that is legible on a light background and one that is legible on a dark background.
### Convert the logos
Convert each logo into a byte array with the [File2Raw](https://file2raw.labrat.one/) utility:
1. Open File2Raw and select the logo file.
2. Select **Gzip Compress** and **Use PROGMEM (Arduino)**.
3. Click **Convert** and copy the generated data.
Repeat the procedure for the light and the dark variant.
The conversion utility is provided as is, without warranty or liability of any kind.
### Update `logo.h`
Open `src/logo.h` in the ElegantOTA Pro library and update the definitions:
```cpp title="logo.h"
#define ELEGANTOTA_LOGO_GZIPPED 1 // 1 if the data is gzip-compressed
#define ELEGANTOTA_LOGO_WIDTH 220 // Display width in px
#define ELEGANTOTA_LOGO_HEIGHT 34 // Display height in px
#define ELEGANTOTA_LIGHT_LOGO_MIME "image/svg+xml"
extern const uint8_t ELEGANTOTA_LIGHT_LOGO[2392]; // Length of your array
#define ELEGANTOTA_DARK_LOGO_MIME "image/svg+xml"
extern const uint8_t ELEGANTOTA_DARK_LOGO[2390]; // Length of your array
```
- Set each MIME type to match the image format, for example `"image/png"` or `"image/jpeg"`.
- Set `ELEGANTOTA_LOGO_GZIPPED` to `1` if you selected **Gzip Compress**, and to `0` otherwise. The setting applies to both variants.
- Set the width and height to the proportions of your logo. The portal displays the logo at exactly this size.
- Set the array lengths in the `extern` declarations to the lengths of the new arrays.
### Update `logo.cpp`
Open `src/logo.cpp` and replace the contents of `ELEGANTOTA_LIGHT_LOGO` and `ELEGANTOTA_DARK_LOGO` with the generated data. The array lengths in `logo.cpp` must match the declarations in `logo.h` exactly.
### Upload the firmware
Compile the sketch with the modified library and upload the firmware to your device.
The device allows browsers to cache the logo for 15 minutes. Clear the browser cache or perform a hard refresh to see the new logo immediately.
The portal now displays your logo and switches between the light and dark variants with the color scheme.
Logos and other branding elements may be subject to copyright and trademark law. Ensure that you have the necessary rights or permissions to use any branding elements in your project.
# Commercial License (/docs/elegantota/commercial-license)
> Compare the licensing, support and features of ElegantOTA Lite (AGPL-3.0) and ElegantOTA Pro (commercial license).
Library: ElegantOTA
ElegantOTA is available in two editions of the same OTA update library: ElegantOTA Lite, which is open source and licensed under AGPL-3.0, and ElegantOTA Pro, which is distributed under the SOFTT Commercial License. The editions differ in features, support and licensing terms.
## Comparison
| | ElegantOTA Lite | ElegantOTA Pro |
| --- | --- | --- |
| License | Open source, AGPL-3.0 | SOFTT Commercial License |
| Source-disclosure obligations | Free to use, modify and distribute. If you use ElegantOTA Lite in a commercial product, AGPL-3.0 requires you to make the source code of your product, including any modifications to ElegantOTA Lite, publicly available. | You can use ElegantOTA Pro in a commercial product without open-sourcing your proprietary code. |
| Support | Community-driven, through online forums, documentation and user-contributed resources. Professional support may be limited. | Dedicated support and assistance. |
| OTA modes | [File](/docs/elegantota/ota-modes/file) | File, [Direct Download](/docs/elegantota/ota-modes/direct-download) and [Auto Update](/docs/elegantota/ota-modes/auto) |
| Features | Core OTA functionality. | Extended functionality, such as runtime control of OTA modes and update targets, hardware ID, firmware version, custom title and branding. Features available only in ElegantOTA Pro are marked in this documentation. |
| Cost model | Free | One-time license fee |
## Choosing an edition
- **ElegantOTA Lite** fits open-source projects, and projects in which the AGPL-3.0 requirements are acceptable and basic OTA update functionality is sufficient.
- **ElegantOTA Pro** fits commercial products. It provides a more comprehensive, professionally supported solution and lets you keep your code proprietary, in exchange for a one-time commercial license fee.
## Get ElegantOTA Pro
ElegantOTA Pro is available on the official product page at [store.softt.io](https://store.softt.io/products/elegantota-pro).
# Auto Reboot (/docs/elegantota/features/auto-reboot)
> Control whether ElegantOTA reboots the device automatically after a successful OTA update.
Library: ElegantOTA
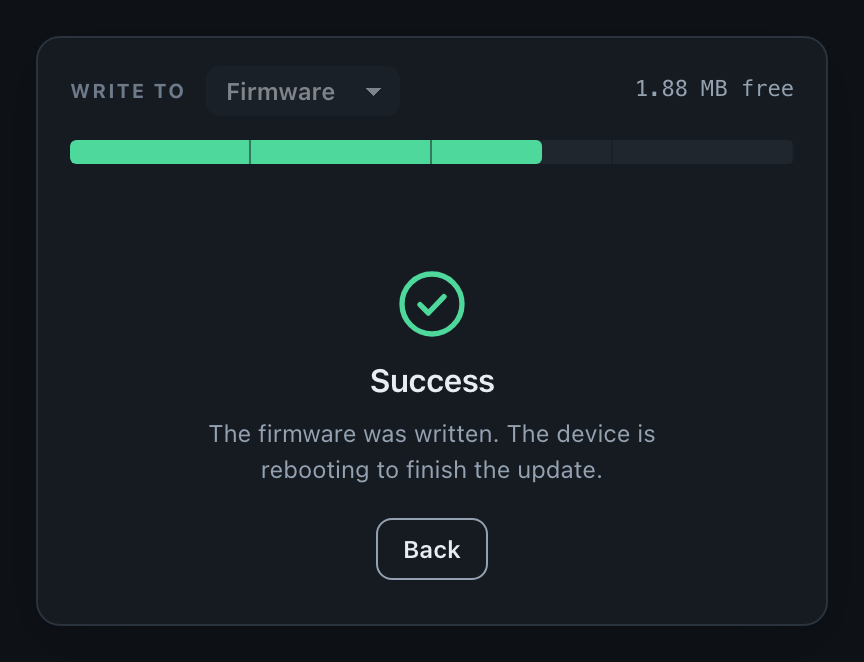
By default, ElegantOTA reboots the device after a successful update so that the new firmware or filesystem image takes effect. If your application must decide when to restart, for example to finish a task or save state first, disable auto reboot.
## Set auto reboot
Call `setAutoReboot()` with `false` to disable automatic reboots, or with `true` to enable them again. You can call it at any time.
```cpp
ElegantOTA.setAutoReboot(false);
```
## Example
```cpp title="main.cpp"
#include
// ... web server declaration
void setup() {
// ... connect to Wi-Fi
ElegantOTA.begin(&server);
ElegantOTA.setAutoReboot(false); // Restart the device from your own code
server.begin();
}
void loop() {
server.handleClient();
ElegantOTA.loop();
}
```
## Behavior
- With auto reboot enabled, `ElegantOTA.loop()` restarts the device about two seconds after a successful update. Your sketch must call `ElegantOTA.loop()` for the reboot to happen.
- The portal adapts its message: with auto reboot enabled, it states that the device is rebooting to finish the update; with auto reboot disabled, it asks you to restart the device.
- With auto reboot disabled, the new image takes effect at the next restart. Restart the device from your code, for example in the [`onEnd`](/docs/elegantota/features/callbacks#onend) callback or later, when your application is ready.
# Callbacks (/docs/elegantota/features/callbacks)
> Run your own code when an ElegantOTA update starts, progresses and ends, and, in ElegantOTA Pro, when an update channel offers a new version.
Library: ElegantOTA
ElegantOTA provides callbacks that run your code at different stages of an update. Use them to prepare the device, report progress or react to the result.
| Callback | Signature | Edition |
| --- | --- | --- |
| [`onStart`](#onstart) | `void()` | Lite and Pro |
| [`onProgress`](#onprogress) | `void(size_t current, size_t final)` | Lite and Pro |
| [`onEnd`](#onend) | `void(bool success)` | Lite and Pro |
| [`onUpdateAvailable`](#onupdateavailable) | `void(const char* version, const char* notes)` | Pro |
Each registration function accepts a `std::function`, so you can pass a function, a lambda or a bound member function. Registering a callback again replaces the previous one.
## `onStart`
`onStart` fires when an update begins, before the flash region is opened. Use it to prepare the device, for example to save important data, put outputs in a safe state or stop tasks that access the filesystem.
```cpp
ElegantOTA.onStart([]() {
Serial.println("OTA update started");
// Prepare the device here
});
```
For an upload from the portal, `onStart` fires when the device accepts the `/ota/start` request. In ElegantOTA Pro, for a direct download or an update channel installation, it fires after the server has responded and the size check has passed.
## `onProgress`
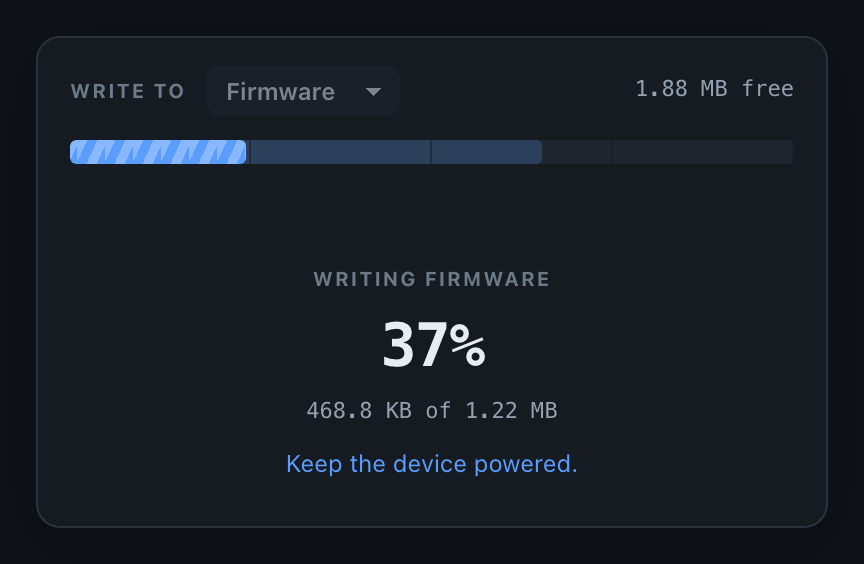
`onProgress` fires repeatedly while data is written. It receives `current`, the number of bytes received so far, and `final`, the total size reported for the transfer. For a download whose server does not report the size, `final` is `0`.
```cpp
unsigned long ota_progress_millis = 0;
ElegantOTA.onProgress([](size_t current, size_t final) {
// Log at most once per second
if (millis() - ota_progress_millis > 1000) {
ota_progress_millis = millis();
if (final > 0) {
Serial.printf("Progress: %u%%\n", (unsigned)((current * 100) / final));
} else {
Serial.printf("Received: %u bytes\n", (unsigned)current);
}
}
});
```
`onProgress` can fire very frequently. Keep it short, and throttle logging or other slow work, as in the example above, so that the update is not slowed down.
## `onEnd`
`onEnd` fires when the update completes, whether it succeeded or failed. The `success` parameter indicates the result. Use it to clean up or to act on the outcome.
```cpp
ElegantOTA.onEnd([](bool success) {
if (success) {
Serial.println("OTA update completed successfully");
} else {
Serial.println("OTA update failed");
}
});
```
If [auto reboot](/docs/elegantota/features/auto-reboot) is enabled, the device restarts shortly after a successful update. In ElegantOTA Pro, `onEnd` fires for a direct download or an update channel installation only if `onStart` fired for it.
## `onUpdateAvailable`
Pro
`onUpdateAvailable` fires when a check of the [update channel](/docs/elegantota/ota-modes/auto) finds a version newer than the running firmware. It receives the offered version and the release notes from the manifest (an empty string if the manifest has none), and lets you decide when to install.
```cpp
ElegantOTA.onUpdateAvailable([](const char* version, const char* notes) {
Serial.printf("Version %s is available\n", version);
// Install now, at a later time, or after a user confirms
ElegantOTA.installUpdate();
});
```
To install every newer version without a decision in your code, call `ElegantOTA.setAutoInstall(true)`.
## Source of an update
Pro
`onStart`, `onProgress` and `onEnd` fire for every update, regardless of how it reached the device. In ElegantOTA Pro, `ElegantOTA.source()` returns the source of the current update:
```cpp
ElegantOTA.onStart([]() {
switch (ElegantOTA.source()) {
case OTA_SOURCE_UPLOAD: Serial.println("Uploaded from the portal"); break;
case OTA_SOURCE_DIRECT: Serial.println("Downloaded by the device"); break;
case OTA_SOURCE_CHANNEL: Serial.println("Installed from the update channel"); break;
}
});
```
| Value | Source |
| --- | --- |
| `OTA_SOURCE_UPLOAD` | A `.bin` file uploaded from the portal ([File](/docs/elegantota/ota-modes/file)). |
| `OTA_SOURCE_DIRECT` | A URL from the portal or from `pullFrom()` ([Direct Download](/docs/elegantota/ota-modes/direct-download)). |
| `OTA_SOURCE_CHANNEL` | The update channel ([Auto Update](/docs/elegantota/ota-modes/auto)). |
`source()` is available only when `ELEGANTOTA_ENABLE_REMOTE` is `1` (the default).
## Example
```cpp title="main.cpp"
#include
// ... web server declaration
unsigned long ota_progress_millis = 0;
void onOTAStart() {
Serial.println("OTA update started");
}
void onOTAProgress(size_t current, size_t final) {
if (millis() - ota_progress_millis > 1000) {
ota_progress_millis = millis();
Serial.printf("OTA progress: %u of %u bytes\n", (unsigned)current, (unsigned)final);
}
}
void onOTAEnd(bool success) {
Serial.println(success ? "OTA update finished successfully" : "OTA update failed");
}
void setup() {
// ... connect to Wi-Fi
ElegantOTA.begin(&server);
ElegantOTA.onStart(onOTAStart);
ElegantOTA.onProgress(onOTAProgress);
ElegantOTA.onEnd(onOTAEnd);
server.begin();
}
void loop() {
server.handleClient();
ElegantOTA.loop();
}
```
# Custom Title (/docs/elegantota/features/custom-title)
> Set the page title of the ElegantOTA Pro portal that the browser displays in its tab.
Library: ElegantOTA
Availability: ElegantOTA Pro only
`setTitle()` sets the title of the portal page. The browser displays it in the tab and window title and uses it for bookmarks, which helps you distinguish the portals of several devices.
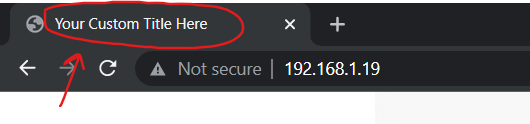
## Set the title
```cpp
ElegantOTA.setTitle("OTA Update - XYZ Inc");
```
If no title is set, the page title is `OTA`.
Do not use double quotes (`"`) or backslashes (`\`) in the title. The value is embedded in the JSON that the portal loads without escaping, and these characters prevent the portal from loading its device information.
## Example
```cpp title="main.cpp"
#include
// ... web server declaration
void setup() {
// ... connect to Wi-Fi
ElegantOTA.setTitle("OTA Update - XYZ Inc");
ElegantOTA.begin(&server);
server.begin();
}
void loop() {
server.handleClient();
ElegantOTA.loop();
}
```
# Firmware Version (/docs/elegantota/features/firmware-version)
> Display the running firmware version in the ElegantOTA Pro portal and provide the version that update channels compare against.
Library: ElegantOTA
Availability: ElegantOTA Pro only
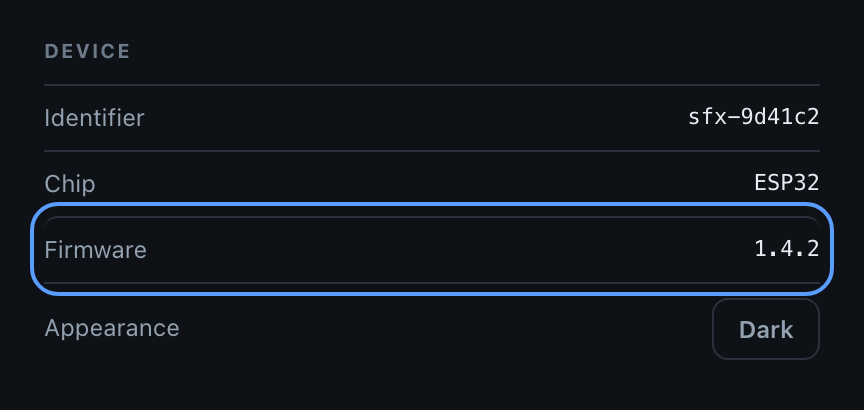
The firmware version identifies the software running on a device. ElegantOTA Pro displays it as **Firmware** in the device section of the portal, and an [update channel](/docs/elegantota/ota-modes/auto) compares it with the version advertised in the manifest to decide whether an update is available.
## Set the firmware version
```cpp
ElegantOTA.setFWVersion("1.0.0");
```
## Example
```cpp title="main.cpp"
#include
// ... web server declaration
void setup() {
// ... connect to Wi-Fi
ElegantOTA.setFWVersion("1.0.0");
ElegantOTA.begin(&server);
server.begin();
}
void loop() {
server.handleClient();
ElegantOTA.loop();
}
```
## Use cases
- **Firmware updates**: determine whether a device needs an update, and verify that it received the correct one. Update channels use the version for this comparison.
- **Compatibility**: confirm that devices that communicate with each other run compatible software.
- **Tracking**: keep a history of the firmware versions installed on each device for troubleshooting.
- **Remote diagnostics**: relate reported problems to specific releases.
## Best practices
- Use a consistent versioning scheme such as [Semantic Versioning](https://semver.org). Update channels compare the numeric fields of the version one by one; see [Version comparison](/docs/elegantota/ota-modes/auto#version-comparison).
- Do not use double quotes (`"`) or backslashes (`\`) in the version. The value is embedded in the JSON that the portal loads without escaping.
- Set the version in `setup()` so that it always reflects the installed firmware.
- Update the value passed to `setFWVersion()` in every release. If a release does not change it, the device keeps reporting the previous version, and an update channel keeps offering the release that is already installed.
# Hardware ID (/docs/elegantota/features/hardware-id)
> Display a unique hardware ID in the ElegantOTA Pro portal to identify a device among others on your network.
Library: ElegantOTA
Availability: ElegantOTA Pro only
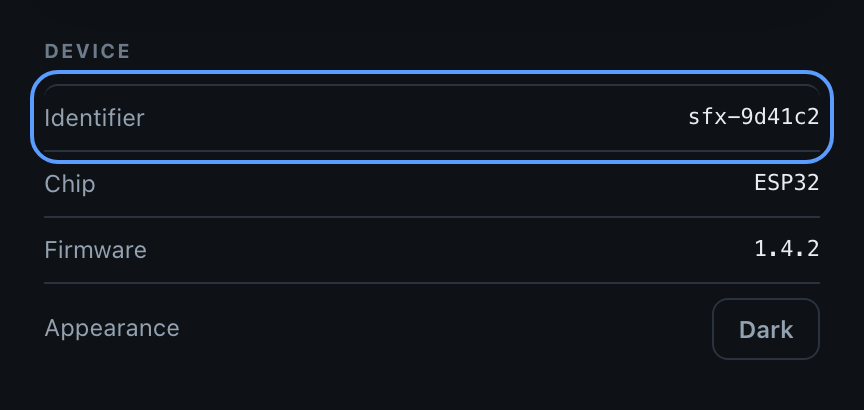
The hardware ID is a string that identifies a device. ElegantOTA Pro displays it as **Identifier** in the device section of the portal, so you can confirm which device you are about to update.
## Set the hardware ID
```cpp
ElegantOTA.setID("my_device_001");
```
If no hardware ID is set, the portal shows a placeholder.
## Example
```cpp title="main.cpp"
#include
// ... web server declaration
void setup() {
// ... connect to Wi-Fi
ElegantOTA.setID("my_device_001");
ElegantOTA.begin(&server);
server.begin();
}
void loop() {
server.handleClient();
ElegantOTA.loop();
}
```
## Best practices
- Use an ID that is unique for each device to avoid confusion.
- Do not use double quotes (`"`) or backslashes (`\`). The value is embedded in the JSON that the portal loads without escaping, and these characters prevent the portal from loading its device information.
- Avoid spaces and other special characters, which can cause problems in network communication or file names.
- Keep a record of the hardware IDs of all your devices.
- Set the hardware ID during initialization, in `setup()`, before the portal is used.
# Async Mode (/docs/elegantota/getting-started/async-mode)
> Serve the ElegantOTA portal through ESPAsyncWebServer, with the dependencies and configuration required on each platform.
Library: ElegantOTA
By default, ElegantOTA registers its routes on the synchronous web server of your platform's Arduino core (`WebServer` or `ESP8266WebServer`). In async mode, it uses `ESPAsyncWebServer` (`AsyncWebServer`) instead.
Enable async mode only if your project uses `ESPAsyncWebServer`. You cannot use the synchronous web server and `ESPAsyncWebServer` in the same firmware.
## Dependencies
Install the following libraries for your platform:
- (ESP32Async) [AsyncTCP](https://github.com/ESP32Async/AsyncTCP#v3.5.0) >= **v3.5.0**
- (ESP32Async) [ESPAsyncWebServer](https://github.com/ESP32Async/ESPAsyncWebServer#v3.12.0) >= **v3.12.0**
- (ESP32Async) [ESPAsyncTCP](https://github.com/ESP32Async/ESPAsyncTCP#v2.0.0) >= **v2.0.0**
- (ESP32Async) [ESPAsyncWebServer](https://github.com/ESP32Async/ESPAsyncWebServer#v3.12.0) >= **v3.12.0**
- (ayushsharma82) [RPAsyncTCP](https://github.com/ayushsharma82/RPAsyncTCP#v1.3.2) >= **v1.3.2**
- (ESP32Async) [ESPAsyncWebServer](https://github.com/ESP32Async/ESPAsyncWebServer#v3.12.0) >= **v3.12.0**
- (ayushsharma82) [RPAsyncTCP](https://github.com/ayushsharma82/RPAsyncTCP#v1.3.2) >= **v1.3.2**
- (ESP32Async) [ESPAsyncWebServer](https://github.com/ESP32Async/ESPAsyncWebServer#v3.12.0) >= **v3.12.0**
In PlatformIO, the ElegantOTA library manifest declares `esp32async/ESPAsyncWebServer@^3.12.0` as a dependency. Add the TCP library for your platform to `lib_deps` yourself, for example:
```ini title="platformio.ini"
lib_deps =
ayushsharma82/ElegantOTA@^4.0.0
esp32async/AsyncTCP@^3.5.0 ; ESP32
; esp32async/ESPAsyncTCP@^2.0.0 ; ESP8266
; ayushsharma82/RPAsyncTCP@^1.3.2 ; RP2040 / RP2350
```
### Use a different fork of a dependency
If your project depends on a fork of `ESPAsyncWebServer` that is not listed above, prevent PlatformIO from installing the declared dependency. This configuration is not tested.
1. Install ElegantOTA manually, as described in [Installation](/docs/elegantota/getting-started/installation).
2. Open the `library.json` file in the ElegantOTA library folder and delete the `dependencies` entry.
## Enable async mode
Async mode is controlled by the `ELEGANTOTA_USE_ASYNC_WEBSERVER` macro, which defaults to `0`.
The Arduino IDE cannot set build flags, so you enable async mode in the library source:
1. Open your Arduino libraries folder.
2. Open the `src` folder of the ElegantOTA library.
3. In `ElegantOTA.h` (ElegantOTA Pro: `ElegantOTAPro.h`), set the `ELEGANTOTA_USE_ASYNC_WEBSERVER` macro to `1`:
```cpp
#define ELEGANTOTA_USE_ASYNC_WEBSERVER 1
```
4. Save the file.
Repeat this change after you update the library, because an update replaces the file.
Add the macro to `build_flags` in `platformio.ini`:
```ini title="platformio.ini"
build_flags = -D ELEGANTOTA_USE_ASYNC_WEBSERVER=1
```
PlatformIO then compiles ElegantOTA in async mode.
## Usage
In async mode, pass a pointer to your `AsyncWebServer` to `ElegantOTA.begin()`. Keep calling `ElegantOTA.loop()` from `loop()`; it is still responsible for rebooting the device after a successful update and, in ElegantOTA Pro, for direct downloads and update channel checks.
```cpp title="main.cpp"
#if defined(ESP8266)
#include
#include
#elif defined(ESP32)
#include
#include
#elif defined(TARGET_RP2040) || defined(TARGET_RP2350) || defined(PICO_RP2040) || defined(PICO_RP2350)
#include
#include
#endif
#include
#include
AsyncWebServer server(80);
void setup() {
// ... connect to Wi-Fi
server.on("/", HTTP_GET, [](AsyncWebServerRequest *request) {
request->send(200, "text/plain", "Hi! This is ElegantOTA AsyncDemo.");
});
ElegantOTA.begin(&server);
server.begin();
}
void loop() {
ElegantOTA.loop();
}
```
## Benefits
- **Non-blocking request handling**: `ESPAsyncWebServer` handles HTTP requests outside your `loop()` function, so the main loop does not have to call a request handler to serve the portal.
- **Responsiveness**: the device can continue other work while it serves the portal and receives an update.
# Examples (/docs/elegantota/getting-started/examples)
> Example sketches in the ElegantOTA and ElegantOTA Pro repositories for the synchronous and asynchronous web servers and for update channels.
Library: ElegantOTA
The ElegantOTA repositories include example sketches that show how to integrate OTA updates with different web servers. Each example builds on the setup described in the [Integration Guide](/docs/elegantota/getting-started/integration) and registers the `onStart`, `onProgress` and `onEnd` [callbacks](/docs/elegantota/features/callbacks), logging progress once per second.
## ElegantOTA Lite
| Example | Description |
| --- | --- |
| [Demo](https://github.com/ayushsharma82/ElegantOTA/tree/master/examples/Demo) | Uses the built-in synchronous web server of the platform. Requires no additional libraries. |
| [AsyncDemo](https://github.com/ayushsharma82/ElegantOTA/tree/master/examples/AsyncDemo) | Uses `ESPAsyncWebServer`. Use it only if your project already uses `ESPAsyncWebServer`, and enable [async mode](/docs/elegantota/getting-started/async-mode) before compiling it. |
All examples are available in the [examples folder](https://github.com/ayushsharma82/ElegantOTA/tree/master/examples) of the repository. In the Arduino IDE, you can also open them from **File > Examples > ElegantOTA** after installing the library.
## ElegantOTA Pro
ElegantOTA Pro ships with the same `Demo` and `AsyncDemo` examples, plus:
| Example | Description |
| --- | --- |
| UpdateChannel | Configures an [update channel](/docs/elegantota/ota-modes/auto) with scheduled checks, reports the source of each update and decides when to install a new version in the `onUpdateAvailable` callback. |
The examples work on the Raspberry Pi Pico W and Pico 2 W only with a LittleFS partition. In the Arduino IDE, select a flash layout with a filesystem, for example **Tools > Flash Size > 2MB (Sketch 1MB, FS 1MB)**.
# Installation (/docs/elegantota/getting-started/installation)
> Install ElegantOTA Lite or ElegantOTA Pro in the Arduino IDE or PlatformIO.
Library: ElegantOTA
This page describes how to install ElegantOTA in the Arduino IDE and in PlatformIO. In its default (synchronous) configuration, ElegantOTA uses the web server built into your platform's Arduino core and needs no additional libraries. To use `ESPAsyncWebServer` instead, also install the dependencies listed in [Async Mode](/docs/elegantota/getting-started/async-mode).
## Install ElegantOTA Lite
### Library Manager [#library-manager]
Open **Sketch > Include Library > Manage Libraries**, search for "ElegantOTA" and click **Install**.
### Manual installation [#manual-installation]
1. Download the [ElegantOTA repository archive](https://github.com/ayushsharma82/ElegantOTA/archive/master.zip).
2. Extract the archive into your Arduino libraries folder:
- Windows: `Documents/Arduino/libraries/`
- Linux: `/libraries/`
### Import a ZIP library [#import-a-zip-library]
1. Download the [ElegantOTA repository archive](https://github.com/ayushsharma82/ElegantOTA/archive/master.zip).
2. Open **Sketch > Include Library > Add .ZIP Library** and select the downloaded file.
ElegantOTA supports multiple architectures. Without strict compatibility checks, PlatformIO tries to resolve the dependencies of every platform, which often causes compilation errors. Before installing ElegantOTA:
1. Delete the `.pio/libdeps` folder of your project, if it exists.
2. Add the following line to the environment in your `platformio.ini` file:
```ini
lib_compat_mode = strict
```
3. Save `platformio.ini`.
### Library Manager [#library-manager-1]
Open the PlatformIO menu, go to **Libraries**, search for "ElegantOTA" and add it to your project. Alternatively, add the library to `lib_deps`:
```ini title="platformio.ini"
lib_deps =
ayushsharma82/ElegantOTA@^4.0.0
lib_compat_mode = strict
```
### Manual installation [#manual-installation-1]
1. Download the [ElegantOTA repository archive](https://github.com/ayushsharma82/ElegantOTA/archive/master.zip).
2. Extract the archive into the `lib` folder of your project.
## Install ElegantOTA Pro
ElegantOTA Pro is not published in the Arduino or PlatformIO library registries. Install it from the source you received with your license.
1. Download the ElegantOTA Pro library as a ZIP archive.
2. Open **Sketch > Include Library > Add .ZIP Library** and select the archive.
Alternatively, extract the library folder into the `libraries` folder of your sketchbook.
Copy the ElegantOTA Pro library folder into the `lib` folder of your project, or reference its Git repository in `lib_deps`. Pulling the library over Git requires your machine to be authenticated with the GitHub account that has access to the repository.
As with ElegantOTA Lite, add `lib_compat_mode = strict` to `platformio.ini` and delete an existing `.pio/libdeps` folder before rebuilding.
In your sketch, include the Pro header instead of the Lite header:
```cpp
#include
```
The global `ElegantOTA` object and the core API are the same in both editions.
## Next steps
- [Integration Guide](/docs/elegantota/getting-started/integration): add the OTA portal to an existing web server sketch.
- [Async Mode](/docs/elegantota/getting-started/async-mode): use ElegantOTA with `ESPAsyncWebServer`.
- [Examples](/docs/elegantota/getting-started/examples): browse the example sketches.
# Integration Guide (/docs/elegantota/getting-started/integration)
> Add the ElegantOTA update portal to an existing web server sketch in three steps.
Library: ElegantOTA
This guide adds ElegantOTA to a sketch that already runs a web server. It uses the synchronous web server of your platform's Arduino core; for `ESPAsyncWebServer`, see [Async Mode](/docs/elegantota/getting-started/async-mode).
### Include the library
Include ElegantOTA at the top of your sketch:
```cpp
#include
```
With ElegantOTA Pro, include `` instead.
### Call `begin()` in `setup()`
Pass a pointer to your web server to `ElegantOTA.begin()`. This registers the portal and the update endpoints on the server.
```cpp
ElegantOTA.begin(&server);
```
`begin()` optionally accepts a username and a password to protect the portal with HTTP Basic Authentication. See [Authentication](/docs/elegantota/security/authentication).
### Call `loop()` in `loop()`
Call `ElegantOTA.loop()` from the `loop()` function of your sketch. ElegantOTA uses it to reboot the device after a successful update. In ElegantOTA Pro, it also drives direct downloads and update channel checks.
```cpp
ElegantOTA.loop();
```
### Open the portal
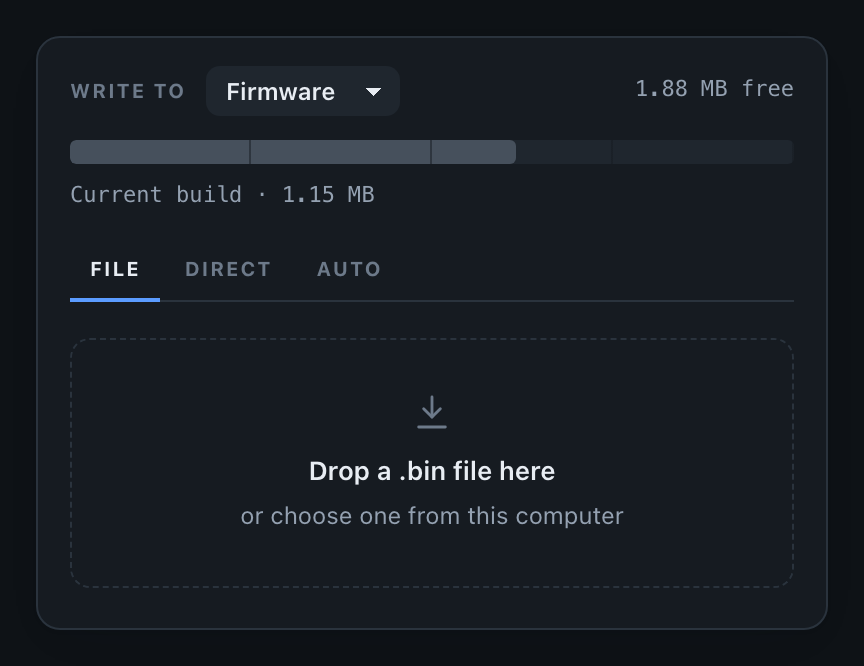
Upload the sketch and open `http:///update` in a browser.
## Complete example
The following sketch connects to a Wi-Fi network, serves a page at `/` and adds the OTA portal:
```cpp title="main.cpp"
#if defined(ESP8266)
#include
#include
#include
#elif defined(ESP32)
#include
#include
#include
#elif defined(TARGET_RP2040) || defined(TARGET_RP2350) || defined(PICO_RP2040) || defined(PICO_RP2350)
#include
#include
#include
#include
#endif
#include
const char* ssid = "your-ssid";
const char* password = "your-password";
#if defined(ESP8266)
ESP8266WebServer server(80);
#else
WebServer server(80);
#endif
void setup() {
Serial.begin(115200);
WiFi.mode(WIFI_STA);
WiFi.begin(ssid, password);
// Wait for the connection
while (WiFi.status() != WL_CONNECTED) {
delay(500);
Serial.print(".");
}
Serial.println();
Serial.print("IP address: ");
Serial.println(WiFi.localIP());
server.on("/", []() {
server.send(200, "text/plain", "Hi! This is ElegantOTA Demo.");
});
ElegantOTA.begin(&server); // Start ElegantOTA
server.begin();
Serial.println("HTTP server started");
}
void loop() {
server.handleClient();
ElegantOTA.loop();
}
```
## Next steps
- [Callbacks](/docs/elegantota/features/callbacks): run your own code when an update starts, progresses and ends.
- [Authentication](/docs/elegantota/security/authentication): protect the portal with a username and password.
- [File](/docs/elegantota/ota-modes/file): how the portal writes firmware and filesystem images.
# Introduction (/docs/elegantota)
> ElegantOTA is a C++ library that serves a web portal for over-the-air firmware and filesystem updates on ESP32, ESP8266, RP2040 and RP2350.
Library: ElegantOTA
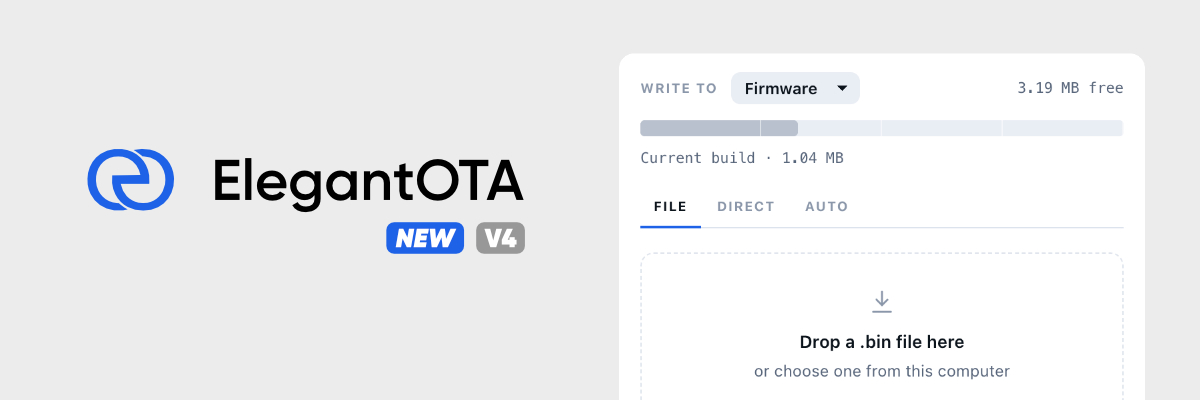
ElegantOTA adds an over-the-air (OTA) update portal to your microcontroller. The portal is served by the device itself at `/update`: you select a `.bin` file, the portal checks that it fits the target flash region, and the device writes it while the portal reports progress and the result. You do not need to write HTML, CSS or JavaScript; the integration takes three lines of code.
GitHub repository: https://github.com/ayushsharma82/ElegantOTA
## Key capabilities
- **Three-line integration**: include the library, call `ElegantOTA.begin()` and call `ElegantOTA.loop()`.
- **Firmware and filesystem updates**: write a firmware image or a LittleFS/SPIFFS filesystem image.
- **Capacity check**: the portal compares the image size with the target region before any data is written, and refuses an image that does not fit.
- **Integrity verification**: the portal computes the MD5 digest of the file in the browser, and the device rejects the update if the written data does not match.
- **Progress and status**: live progress, transfer rate and byte counts during the update.
- **HTTP Basic Authentication**: optional username and password protection for the portal and its endpoints.
- **Synchronous or asynchronous web server**: works with the platform's built-in `WebServer` or with `ESPAsyncWebServer`.
- **Light and dark portal themes**.
## Supported boards
| Platform | Notes |
| --- | --- |
| **ESP32** | Including the ESP32-S2, ESP32-S3, ESP32-C3 and ESP32-C6 variants. |
| **RP2040** (Raspberry Pi Pico W) | Requires a LittleFS partition. |
| **RP2350** (Raspberry Pi Pico 2 W) | Requires a LittleFS partition. |
| **ESP8266** | Maintained for existing projects. Prefer ESP32 or RP2350 for new designs. |
These boards stage the incoming image inside the filesystem region, so a LittleFS partition is mandatory. In the Arduino IDE, select a flash layout with a filesystem, for example **Tools > Flash Size > 2MB (Sketch 1MB, FS 1MB)**. ElegantOTA requires a board with a Wi-Fi chip, such as the Pico W or Pico 2 W; on an RP2040 or RP2350 board without Wi-Fi, `ElegantOTA.begin()` does not register any routes.
## ElegantOTA Lite and ElegantOTA Pro
This documentation covers both editions of ElegantOTA. ElegantOTA Lite is open source and licensed under AGPL-3.0. ElegantOTA Pro is a commercial edition that adds:
- Two additional OTA modes: [Direct Download](/docs/elegantota/ota-modes/direct-download), in which the device downloads firmware from a URL, and [Auto Update](/docs/elegantota/ota-modes/auto), in which the device checks an update channel on a schedule.
- Runtime control over the available OTA modes and update targets.
- [Hardware ID](/docs/elegantota/features/hardware-id), [firmware version](/docs/elegantota/features/firmware-version) and a [custom title](/docs/elegantota/features/custom-title) in the portal.
- Custom [branding](/docs/elegantota/branding).
- A commercial license.
Pages for features that are available only in ElegantOTA Pro are marked accordingly. See [Commercial License](/docs/elegantota/commercial-license) for a comparison, or visit [store.softt.io](https://store.softt.io/products/elegantota-pro).
## Explore the documentation
# Auto Update (/docs/elegantota/ota-modes/auto)
> Configure an update channel so the device checks a JSON manifest on a schedule and installs newer firmware. Covers the manifest, version comparison and onUpdateAvailable.
Library: ElegantOTA
Availability: ElegantOTA Pro only
In Auto mode, the device updates itself. You compile an **update channel** into the firmware: a URL that points to a small JSON manifest describing the latest release. The device fetches the manifest on a schedule, compares the advertised version with its own, and can install the new firmware without anyone opening the portal.
Auto mode is designed for fleets of devices that you cannot reach individually.
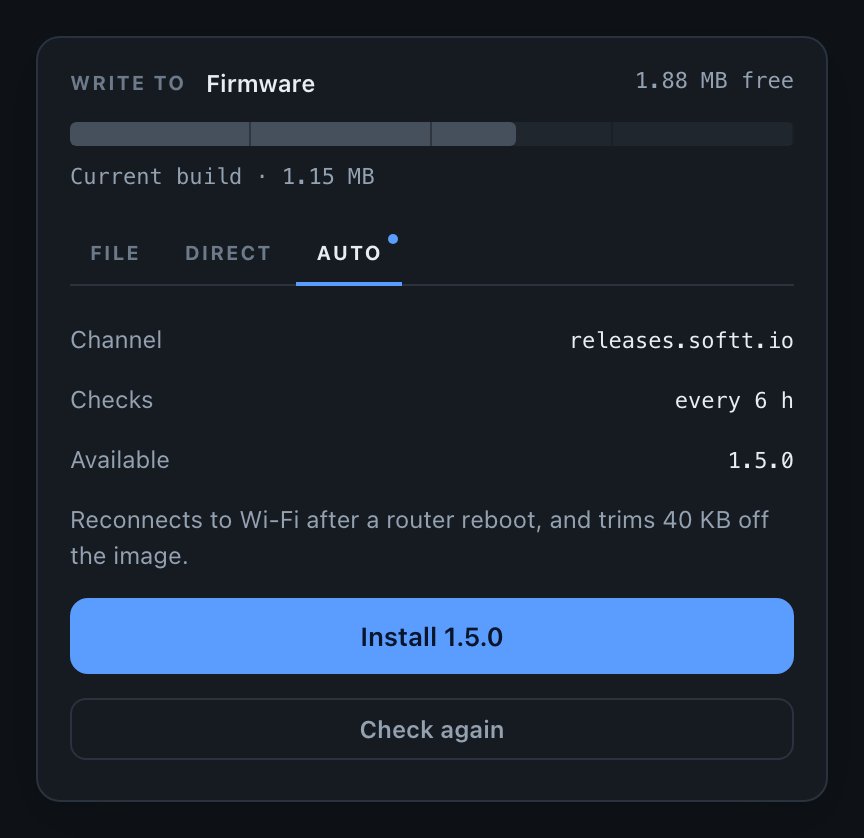
## The manifest
Host a manifest like the following anywhere the device can reach over HTTP or HTTPS, for example in object storage, as a GitHub release asset or on your own server:
```json title="latest.json"
{
"version": "1.2.0",
"url": "https://example.com/firmware/my-device-1.2.0.bin",
"md5": "6f5902ac237024bdd0c176cb93063dc4",
"notes": "Reconnects to Wi-Fi after a router reboot"
}
```
- All values must be JSON strings, and only top-level fields are read. Unknown fields are ignored, so you can keep your own metadata in the same file.
- A manifest whose reported size (`Content-Length`) exceeds 4096 bytes is rejected. Keep the manifest small.
- An update channel always carries firmware; the manifest has no field to select a target. A filesystem image has no version for the device to compare against, so write one with [File](/docs/elegantota/ota-modes/file) or [Direct Download](/docs/elegantota/ota-modes/direct-download), where you choose the target explicitly.
Include `md5` whenever possible. It is the only way for the device to verify that the data it wrote matches the image you published.
## Set up an update channel
### Set the running version
The device compares the manifest version with its own version, so set it with [`setFWVersion()`](/docs/elegantota/features/firmware-version):
```cpp
ElegantOTA.setFWVersion("1.0.0");
```
If no firmware version is set, every manifest version is considered newer, and the device offers or installs the advertised firmware on every check.
### Set the manifest URL
```cpp
ElegantOTA.setUpdateURL("https://example.com/firmware/latest.json");
```
### Set the check interval
```cpp
ElegantOTA.setCheckInterval(6 * 60 * 60 * 1000UL); // Every 6 hours
```
The interval is in milliseconds. If you pass `0` or do not call `setCheckInterval()`, the device checks only when you call `checkForUpdate()` or when someone clicks **Check for updates** in the portal.
### Choose whether to install automatically
```cpp
ElegantOTA.setAutoInstall(true); // Install as soon as a newer version is found
```
With `setAutoInstall(false)` (the default), a check that finds a newer version only records it. The portal then shows an **Install** button, and your code decides when to install, for example in the [`onUpdateAvailable`](#react-to-a-new-version) callback.
## Version comparison
The numeric parts of the versions are compared field by field, so `1.10.0` is newer than `1.9.4`. A leading `v` is ignored. A pre-release suffix after a hyphen sorts below the same version without a suffix, and two pre-release suffixes are compared as text.
| Running | Manifest | Update offered |
| --- | --- | --- |
| `1.0.0` | `1.0.1` | Yes |
| `1.9.4` | `1.10.0` | Yes |
| `1.2.0` | `v1.2.0` | No (same version) |
| `1.2.3` | `1.2` | No |
| `1.0.0-rc1` | `1.0.0` | Yes (a release is newer than its pre-release) |
| `1.0.0-rc1` | `1.0.0-rc2` | Yes |
| `1.0.0` | `1.0.0-rc1` | No |
Versions that contain no digits, such as build hashes or code names, are considered newer whenever they differ from the running version.
## React to a new version
`onUpdateAvailable` fires whenever a check finds a newer version. Use it to decide when to install, for example when the device is idle, when the battery is charged or after a user confirms the update.
```cpp
void onUpdateAvailable(const char* version, const char* notes) {
Serial.printf("Version %s is available\n", version);
if (strlen(notes)) Serial.println(notes);
if (machineIsIdle()) { // Your own condition
ElegantOTA.installUpdate();
}
}
void setup() {
// ...
ElegantOTA.begin(&server);
ElegantOTA.onUpdateAvailable(onUpdateAvailable);
}
```
The callback fires on every check that finds a newer version, not only on the first. If auto install is enabled, the installation starts after the callback returns.
During the installation, the regular [callbacks](/docs/elegantota/features/callbacks) `onStart`, `onProgress` and `onEnd` fire, and `ElegantOTA.source()` returns `OTA_SOURCE_CHANNEL`.
## Check on demand
`setCheckInterval()` starts its timer when you call it, so the first scheduled check takes place one interval later. To check at boot as well, call `checkForUpdate()`:
```cpp
ElegantOTA.begin(&server);
ElegantOTA.checkForUpdate(); // Check once now
```
`checkForUpdate()` and `installUpdate()` queue the work and return immediately. The manifest and the firmware are fetched in `ElegantOTA.loop()`, so make sure your sketch calls it. Scheduled checks are skipped while a download is in progress.
## Reference
```cpp
void setUpdateURL(const char * url); // Manifest URL
const char * getUpdateURL();
void setCheckInterval(uint32_t interval_ms); // 0 disables scheduled checks
void setAutoInstall(bool enable); // Install without confirmation (default: false)
bool checkAutoInstall();
bool checkForUpdate(); // Queue a check now
bool installUpdate(); // Install the version found by the last check
bool updateAvailable(); // A newer version was found
const char * availableVersion(); // Its version, or ""
const char * availableNotes(); // Its notes, or ""
void onUpdateAvailable(std::function callable);
```
`checkForUpdate()` returns `false` if Auto mode is disabled, no update channel is set, or the device is busy. `installUpdate()` returns `false` if Auto mode is disabled, no newer version is waiting, the device is busy, or firmware updates are disabled with [`setFirmwareMode(false)`](/docs/elegantota/security/disable-firmware-ota).
## Disable Auto mode
All three OTA modes are enabled by default. Disabling Auto mode stops scheduled checks, removes the **Auto** tab from the portal, and makes `checkForUpdate()` and `installUpdate()` return `false`:
```cpp
ElegantOTA.setAutoMode(false);
```
You can use it to pause automatic updates while a critical task is running and enable them again afterwards:
```cpp
ElegantOTA.setAutoMode(!machineIsBusy());
```
Disabling Auto mode differs from not configuring a channel. Without `setUpdateURL()`, there is nothing to check, and the **Auto** tab states that no update channel is set. With `setAutoMode(false)`, a channel is configured but deliberately not checked.
```cpp
if (ElegantOTA.checkAutoMode() == false) {
Serial.println("Automatic updates are paused");
}
```
## HTTPS
The manifest and the firmware are fetched with the same client, so `setCACert()` applies to both. See [Direct Download](/docs/elegantota/ota-modes/direct-download#https) for how to pin a root certificate.
An update channel instructs the device to run whatever firmware the manifest points to. Treat the server that hosts your manifest and firmware as part of your firmware's trust boundary: pin a root certificate, and restrict write access to the storage that serves the files.
## Other OTA modes
- [File](/docs/elegantota/ota-modes/file): upload a `.bin` file from your computer. Available in ElegantOTA Lite and Pro.
- [Direct Download](/docs/elegantota/ota-modes/direct-download): give the device a URL to download a single image.
# Direct Download (/docs/elegantota/ota-modes/direct-download)
> Let the device download a firmware or filesystem image itself from an HTTP or HTTPS URL, from the portal or from your own code.
Library: ElegantOTA
Availability: ElegantOTA Pro only
In Direct Download mode, the device downloads the image itself over HTTP or HTTPS. In a regular upload, the image travels twice: from the build server to the browser, and from the browser to the device. With Direct Download, you enter a URL in the portal and the device fetches the image directly.
This is useful when the image is large, when the browser is on a slow connection, or when you do not want to keep the portal open during the transfer. The portal shows the progress, but the device performs the download, so the transfer continues if you close the page.
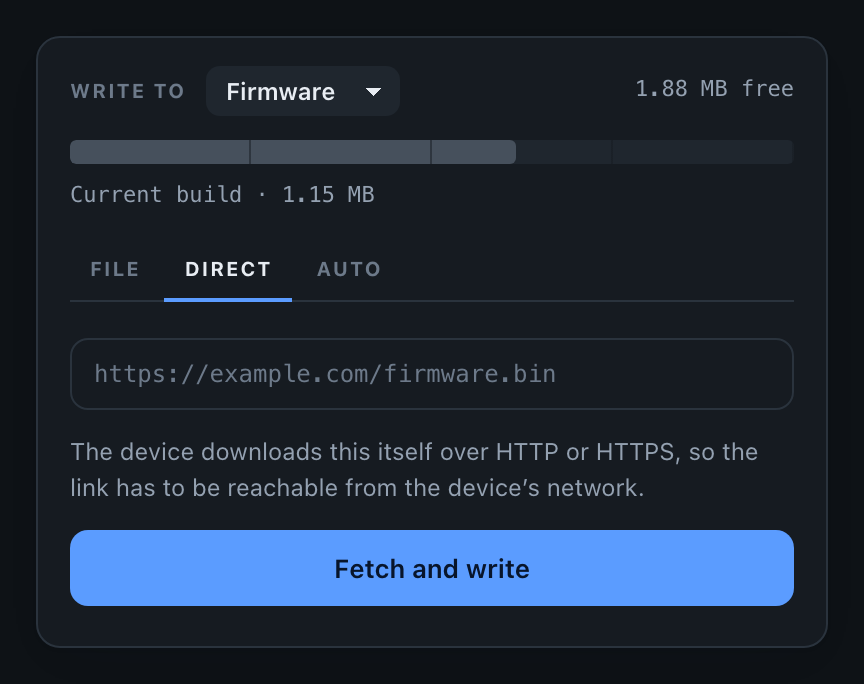
The URL must start with `http://` or `https://`, point to a raw `.bin` image and be at most 256 characters long. It must be reachable from the device's network, not only from your computer. Redirects are followed, so a GitHub release asset link works.
## Use the portal
1. Open the portal and select the **Direct** tab.
2. Choose the target (firmware or filesystem) in the **Write to** selector.
3. Paste the URL and click **Fetch and write**.
The device connects to the server and, if the server reports the image size, checks that the image fits the target region before it writes anything. It then streams the image into flash.
## Start a download from your code
You can start the same download from your sketch with `pullFrom()`, without anyone using the portal:
```cpp title="main.cpp"
#include
// ... web server declaration
void setup() {
// ... connect to Wi-Fi and configure the web server
ElegantOTA.begin(&server);
server.begin();
}
void loop() {
server.handleClient();
ElegantOTA.loop(); // Drives the download
}
void installNightlyBuild() {
ElegantOTA.pullFrom("https://example.com/firmware/nightly.bin");
}
```
`pullFrom()` queues the download and returns immediately. The transfer is performed by `ElegantOTA.loop()`, a slice at a time, so your sketch keeps running while the download is in progress.
### Signature
```cpp
bool pullFrom(const char * url,
OTA_Mode mode = OTA_MODE_FIRMWARE,
const char * md5 = NULL);
```
`pullFrom()` returns `true` if the download was queued, and `false` if:
- the device is already busy with a download or an update channel check,
- the URL does not start with `http://` or `https://`, or is too long, or
- the selected update target is disabled with [`setFirmwareMode()`](/docs/elegantota/security/disable-firmware-ota) or [`setFilesystemMode()`](/docs/elegantota/security/disable-filesystem-ota).
Pass an MD5 digest whenever you can. The device compares it with the data it wrote, so a truncated or corrupted download is rejected instead of installed:
```cpp
ElegantOTA.pullFrom("https://example.com/firmware/2.1.0.bin",
OTA_MODE_FIRMWARE,
"6f5902ac237024bdd0c176cb93063dc4");
```
## Monitor the download
The same [callbacks](/docs/elegantota/features/callbacks) fire as for an upload from the portal: `onStart`, `onProgress` and `onEnd`. To distinguish the two, check the source of the update:
```cpp
ElegantOTA.onStart([]() {
if (ElegantOTA.source() == OTA_SOURCE_DIRECT) {
Serial.println("The device is downloading an image");
}
});
```
`onStart` fires after the server has responded and the size check has passed. `onEnd` fires only for a download whose `onStart` fired, so a URL that cannot be reached does not produce an `onEnd(false)`. If the server does not report the image size, the `final` argument of `onProgress` is `0`.
You can also read the state of the device-side task with `state()`:
```cpp
switch (ElegantOTA.state()) {
case OTA_STATE_IDLE: break; // Nothing in progress
case OTA_STATE_QUEUED: break; // Accepted, not started
case OTA_STATE_CHECKING: break; // Fetching the update channel manifest
case OTA_STATE_CONNECTING: break; // Opening the connection
case OTA_STATE_TRANSFERRING: break; // Writing to flash
case OTA_STATE_SUCCESS: break; // Written; the device reboots if auto reboot is enabled
case OTA_STATE_FAILED: break; // The portal shows the reason
default: break;
}
```
`state()` describes only downloads and update channel checks. Uploads from the portal do not change it.
## HTTPS
`https://` URLs work without configuration, but the server certificate is **not verified** unless you pin a root certificate. An unverified connection protects the transfer against passive eavesdropping, but not against a server that impersonates the real one.
For production devices, pin the root certificate of the host you download from:
```cpp
static const char UPDATE_ROOT_CA[] PROGMEM = R"CERT(
-----BEGIN CERTIFICATE-----
... your root CA ...
-----END CERTIFICATE-----
)CERT";
void setup() {
ElegantOTA.setCACert(UPDATE_ROOT_CA);
ElegantOTA.begin(&server);
}
```
Pass `NULL` to return to unverified connections. On ESP32, the library keeps a pointer to the certificate, so the certificate must remain valid for the lifetime of the program; declare it `static` or global, as above.
On these platforms, HTTPS uses BearSSL with a receive buffer of `ELEGANTOTA_TLS_RX_SIZE` bytes (default `16384`), which costs RAM. If HTTPS downloads fail while HTTP downloads work and free heap is low, reduce `ELEGANTOTA_TLS_RX_SIZE`, or serve the image over plain HTTP on a network you trust.
## Disable Direct Download
All three OTA modes are enabled by default. Anyone who can open the portal, which means anyone who passes [authentication](/docs/elegantota/security/authentication), can make the device download an image from a URL of their choice. To prevent this, disable the mode:
```cpp
ElegantOTA.setDirectDownloadMode(false);
```
The **Direct** tab disappears from the portal and the `/ota/download` endpoint refuses requests. `pullFrom()` called from your own code is not affected. See [Disable Direct Download](/docs/elegantota/security/disable-direct-download).
## Compile-time options
The following macros control the download. Define them as build flags or before including the library.
| Macro | Default | Description |
| --- | --- | --- |
| `ELEGANTOTA_PULL_BUDGET` | `8192` | Maximum number of bytes transferred per `loop()` call. Increase it for faster downloads; decrease it if your sketch needs more time per loop iteration. |
| `ELEGANTOTA_PULL_TIMEOUT` | `10000` | Time in milliseconds without received data after which a stalled download is aborted. |
| `ELEGANTOTA_TLS_RX_SIZE` | `16384` | BearSSL receive buffer size in bytes (ESP8266, RP2040, RP2350). |
| `ELEGANTOTA_TLS_TX_SIZE` | `512` | BearSSL transmit buffer size in bytes (ESP8266, RP2040, RP2350). |
| `ELEGANTOTA_ENABLE_REMOTE` | `1` | Set to `0` to remove the HTTP client, Direct Download and Auto Update from the build and save flash. |
## Other OTA modes
- [File](/docs/elegantota/ota-modes/file): upload a `.bin` file from your computer. Available in ElegantOTA Lite and Pro.
- [Auto Update](/docs/elegantota/ota-modes/auto): the device checks an update channel and installs new firmware without anyone at the portal.
# File (/docs/elegantota/ota-modes/file)
> The default OTA mode, in which you upload a .bin file from the portal. Covers staging, the capacity check, MD5 verification, update targets and the HTTP requests involved.
Library: ElegantOTA
In File mode, you upload a `.bin` file from your computer through the portal, and the device writes it to flash. File mode is available in ElegantOTA Lite and ElegantOTA Pro and requires no configuration beyond the [integration](/docs/elegantota/getting-started/integration).
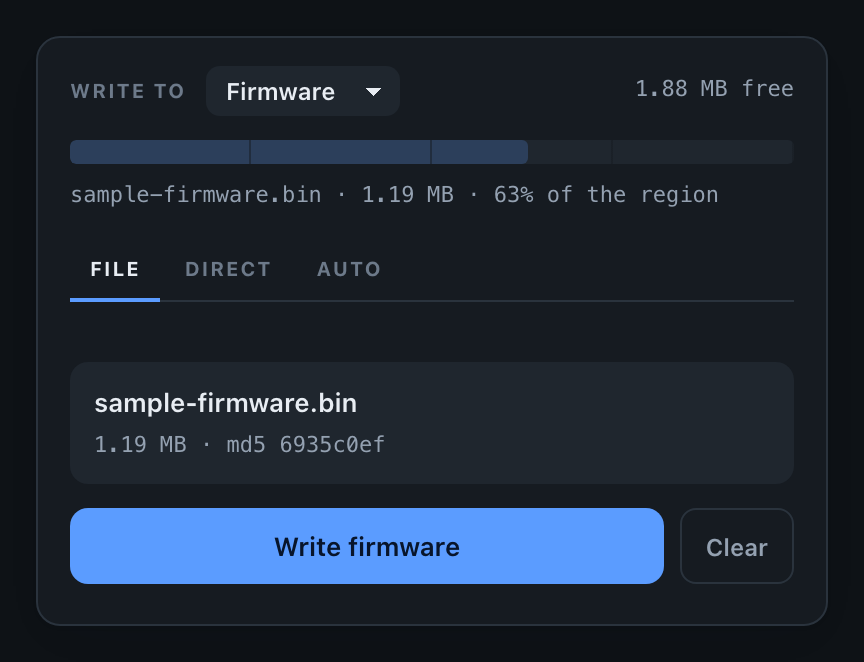
## Upload a file
Upload the raw `.bin` image produced by your build: `firmware.bin` in PlatformIO, or the `.bin` file in the build output of the Arduino IDE. Do not upload a `.uf2` file or an archive.
1. Open `http:///update` and select the **File** tab.
2. Drag a `.bin` file onto the drop zone, or click it to choose a file.
3. Review the staged file, then click **Write firmware** (or **Write filesystem**).
Selecting a file does not write anything. The portal first stages the file: it reads it, computes its MD5 digest and compares its size with the capacity of the target region. The write button is enabled only when the file fits.
### Capacity check
The bar below the header represents the target flash region to scale. If the staged file is larger than the region, the portal reports it, for example:
```text
1.42 MB will not fit the 1.19 MB region
```
The write button remains disabled and nothing is written. When no file is staged, the bar shows how much of the region the running firmware occupies.
### Update targets
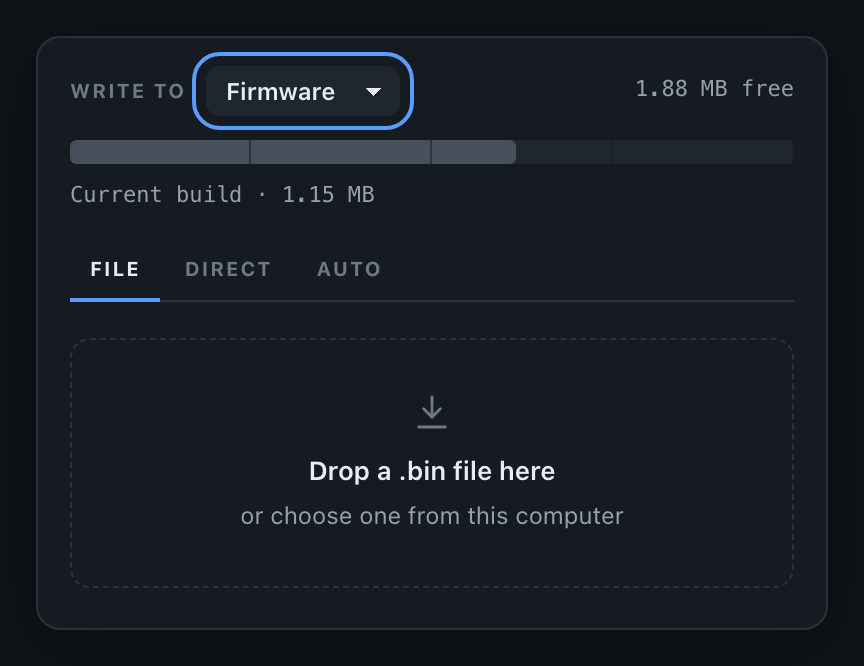
The **Write to** selector chooses whether the file is written to the firmware region or to the filesystem region. The capacity check follows the selection, because the two regions have different sizes.
A filesystem update replaces the entire LittleFS or SPIFFS image. All files currently stored on the device are lost.
In ElegantOTA Pro, you can disable either target. See [Disable Firmware OTA](/docs/elegantota/security/disable-firmware-ota) and [Disable Filesystem OTA](/docs/elegantota/security/disable-filesystem-ota).
## Verification
The portal computes the MD5 digest of the file in the browser and sends it to the device before the transfer starts. The device compares the digest with the data written to flash and rejects the update if they differ.
A truncated upload, an interrupted connection or a corrupted file is therefore rejected, and the device continues to run its current firmware.
## HTTP requests
The portal performs the update with two requests. Both require the credentials configured with [authentication](/docs/elegantota/security/authentication), if any.
| Request | Purpose |
| --- | --- |
| `GET /ota/start?mode=fr&hash=` | Opens the target flash region and records the expected MD5 digest. |
| `POST /ota/upload` | Transfers the file as `multipart/form-data`. |
The `mode` parameter is `fr` for firmware or `fs` for the filesystem image; any other value, or no value, selects firmware. The `hash` parameter is optional. If it is present but is not a 32-character hexadecimal string, the device rejects the request before it opens the flash region.
After a successful write, the device reboots into the new firmware unless you disabled [auto reboot](/docs/elegantota/features/auto-reboot).
## Callbacks
The [callbacks](/docs/elegantota/features/callbacks) fire for File mode as for the other modes:
```cpp
ElegantOTA.onStart([]() {
Serial.println("Update started");
});
ElegantOTA.onProgress([](size_t current, size_t final) {
Serial.printf("%u / %u bytes\n", current, final);
});
ElegantOTA.onEnd([](bool success) {
Serial.println(success ? "Update installed" : "Update failed");
});
```
In ElegantOTA Pro, `ElegantOTA.source()` returns `OTA_SOURCE_UPLOAD` for an update uploaded from the portal, which distinguishes it from an update the device downloaded itself.
## Disable File mode
Pro
All three OTA modes are enabled by default. In ElegantOTA Pro, you can disable File mode so that the portal offers only the modes you want:
```cpp
// Do not accept file uploads from the portal
ElegantOTA.setFileMode(false);
```
The **File** tab disappears from the portal, and `/ota/start` refuses requests, regardless of the client that sends them. If all modes are disabled, the portal states that no update method is enabled.
To read the current setting, call `checkFileMode()`:
```cpp
if (ElegantOTA.checkFileMode() == false) {
Serial.println("File uploads from the portal are disabled");
}
```
`setFileMode()` controls whether an image may be uploaded from the browser. [`setFilesystemMode()`](/docs/elegantota/security/disable-filesystem-ota) controls whether the filesystem region may be overwritten, by any mode. The names are similar, but the settings are independent.
## Other OTA modes
Uploading a file is suitable during development and for devices you can reach. ElegantOTA Pro adds two modes that do not require anyone at the portal:
- [Direct Download](/docs/elegantota/ota-modes/direct-download): the device downloads an image from a URL.
- [Auto Update](/docs/elegantota/ota-modes/auto): the device checks an update channel on a schedule and installs new firmware.
In ElegantOTA Lite, the portal shows both modes as locked tabs.
# Authentication (/docs/elegantota/security/authentication)
> Protect the ElegantOTA portal and update endpoints with HTTP Basic Authentication using a username and password.
Library: ElegantOTA
ElegantOTA supports HTTP Basic Authentication. When it is enabled, the browser asks for a username and password before it opens the portal, and the device rejects update requests without valid credentials. This prevents unauthorized users from installing firmware on your device.
## Enable authentication
Call `setAuth()` with a username and a password:
```cpp
ElegantOTA.setAuth("username", "password");
```
Alternatively, pass the credentials to `begin()`:
```cpp
ElegantOTA.begin(&server, "username", "password");
```
Authentication is enabled only when both the username and the password are non-empty.
## Example
```cpp title="main.cpp"
#include
// ... web server declaration
void setup() {
// ... connect to Wi-Fi
ElegantOTA.begin(&server);
ElegantOTA.setAuth("myUsername", "myPassword");
server.begin();
}
void loop() {
server.handleClient();
ElegantOTA.loop();
}
```
## Clear authentication
To disable authentication after it was set, call `clearAuth()`:
```cpp
ElegantOTA.clearAuth();
```
## Protected endpoints
When authentication is enabled, the following routes require credentials:
| Route | Edition |
| --- | --- |
| `/update` (portal) | Lite and Pro |
| `/ota/start`, `/ota/upload` | Lite and Pro |
| `/ota/download`, `/ota/check`, `/ota/install`, `/ota/status` | Pro |
The `/ota/metadata` route, which the portal uses to display device information, is served without authentication. It reports the chip family, the partition sizes and the size of the running firmware. In ElegantOTA Pro, it also reports the portal title, the hardware ID, the firmware version, the enabled modes and the update channel URL. The Pro logo routes (`/ota/logo/light` and `/ota/logo/dark`) are also public.
## Use cases
- **Security**: prevent unauthorized firmware or filesystem updates.
- **Access control**: assign unique credentials to each device so that only authorized personnel or systems can update it.
- **Compliance**: meet security standards that require authentication for device management interfaces.
## Best practices
- Use strong, unique credentials for each device. Do not use default or easily guessed credentials.
- Store credentials securely and avoid hard-coding them in source code that is shared or published.
- Rotate credentials regularly.
- Test the configuration to confirm that the portal rejects requests without valid credentials.
- HTTP Basic Authentication sends credentials encoded, not encrypted. Use it on networks you trust.
# Disable Direct Download (/docs/elegantota/security/disable-direct-download)
> Prevent the ElegantOTA Pro portal from accepting firmware URLs, or remove the HTTP client from the build entirely.
Library: ElegantOTA
Availability: ElegantOTA Pro only
[Direct Download](/docs/elegantota/ota-modes/direct-download) lets a portal user give the device a URL to download an image from. It is **enabled by default**, so anyone who can open the portal can make the device download from any address.
Behind [authentication](/docs/elegantota/security/authentication), this is a convenience. Without authentication, on a network you do not fully control, it allows others to install firmware you did not write. If your product does not need Direct Download, disable it.
## Disable Direct Download
```cpp
ElegantOTA.setDirectDownloadMode(false);
```
## Enable Direct Download
```cpp
ElegantOTA.setDirectDownloadMode(true);
```
Direct Download is enabled by default after a cold boot.
## Check the setting
```cpp
if (ElegantOTA.checkDirectDownloadMode() == true) {
Serial.println("Direct Download is enabled");
} else {
Serial.println("Direct Download is disabled");
}
```
## Behavior
While Direct Download is disabled:
- The **Direct** tab disappears from the portal.
- The `/ota/download` endpoint refuses requests, regardless of the client that sends them.
The setting only controls URLs submitted through the portal endpoint. The following continue to work:
- Calls to `ElegantOTA.pullFrom()` from your own code.
- Uploading a `.bin` file in [File](/docs/elegantota/ota-modes/file) mode.
- [Auto Update](/docs/elegantota/ota-modes/auto), which only downloads from the update channel compiled into the firmware.
Disabling Direct Download does not replace [authentication](/docs/elegantota/security/authentication). Anyone who can reach an unprotected portal can still upload firmware in File mode.
## Remove remote updates from the build
If you need neither Direct Download nor Auto Update, compile the HTTP client out of the library to save flash:
```ini title="platformio.ini"
build_flags = -D ELEGANTOTA_ENABLE_REMOTE=0
```
The portal then offers only File mode, and the related functions, including `pullFrom()`, `setDirectDownloadMode()`, `setAutoMode()`, `setUpdateURL()`, `setCACert()`, `state()`, `source()` and `onUpdateAvailable()`, are not compiled. Remove any calls to them from your sketch.
# Disable Filesystem OTA (/docs/elegantota/security/disable-filesystem-ota)
> Enable or disable filesystem (LittleFS or SPIFFS) updates at runtime in ElegantOTA Pro, and check whether the filesystem update target is enabled.
Library: ElegantOTA
Availability: ElegantOTA Pro only
ElegantOTA Pro lets you enable or disable each update target at runtime, for security reasons or while a task is running that an update must not interrupt. The update target defines what an update may overwrite: the firmware or the filesystem image. The setting applies to every [OTA mode](/docs/elegantota/ota-modes/file), and the portal hides a disabled target.
Use the functions on this page to control updates of the filesystem image (LittleFS or SPIFFS).
## Disable filesystem updates
```cpp
ElegantOTA.setFilesystemMode(false);
```
## Enable filesystem updates
```cpp
ElegantOTA.setFilesystemMode(true);
```
Both update targets are enabled by default after a cold boot.
## Check the setting
```cpp
if (ElegantOTA.checkFilesystemMode() == true) {
Serial.println("Filesystem updates are enabled");
} else {
Serial.println("Filesystem updates are disabled");
}
```
## Behavior
While filesystem updates are disabled:
- The **Filesystem** option disappears from the **Write to** selector in the portal.
- `/ota/start` rejects filesystem uploads.
- `pullFrom()` with `OTA_MODE_FILESYSTEM` and filesystem direct downloads from the portal are rejected.
`setFilesystemMode()` controls whether the filesystem region may be overwritten. It is unrelated to [`setFileMode()`](/docs/elegantota/ota-modes/file#disable-file-mode), which controls whether images may be uploaded from the browser.
# Disable Firmware OTA (/docs/elegantota/security/disable-firmware-ota)
> Enable or disable firmware updates at runtime in ElegantOTA Pro, and check whether the firmware update target is enabled.
Library: ElegantOTA
Availability: ElegantOTA Pro only
ElegantOTA Pro lets you enable or disable each update target at runtime, for security reasons or while a task is running that an update must not interrupt. The update target defines what an update may overwrite: the firmware or the filesystem image. The setting applies to every [OTA mode](/docs/elegantota/ota-modes/file), and the portal hides a disabled target.

Use this setting carefully. While firmware updates are disabled, the device cannot be updated over the air, and if the setting is left disabled by mistake, the device can no longer be recovered by an OTA update.
## Disable firmware updates
```cpp
ElegantOTA.setFirmwareMode(false);
```
## Enable firmware updates
```cpp
ElegantOTA.setFirmwareMode(true);
```
Both update targets are enabled by default after a cold boot.
## Check the setting
```cpp
if (ElegantOTA.checkFirmwareMode() == true) {
Serial.println("Firmware updates are enabled");
} else {
Serial.println("Firmware updates are disabled");
}
```
## Behavior
While firmware updates are disabled:
- The **Firmware** option disappears from the **Write to** selector in the portal.
- `/ota/start` rejects firmware uploads.
- `pullFrom()` with `OTA_MODE_FIRMWARE` and direct downloads from the portal are rejected.
- `installUpdate()` and automatic installation from an [update channel](/docs/elegantota/ota-modes/auto) are rejected, because an update channel always carries firmware.
If both firmware and filesystem updates are disabled, the portal states that the device does not accept updates.
# Using with Other SOFTT Libraries (/docs/elegantota/using-with-other-libraries)
> Combine ElegantOTA with ESP-DASH, NetWizard and WebSerial in the same project, sharing one AsyncWebServer.
Library: ElegantOTA
ESP-DASH, ElegantOTA, NetWizard and WebSerial are designed to work together in the same project. A single sketch can provide WiFi provisioning (NetWizard), a real-time dashboard (ESP-DASH), over-the-air updates (ElegantOTA) and a remote serial terminal (WebSerial), all served by one `AsyncWebServer` instance. The Lite and Pro editions of each library can be mixed freely.
## Requirements
- **One shared `AsyncWebServer`.** Create a single `AsyncWebServer server(80);` and pass it to every library. Call `server.begin()` once, after all libraries are initialized.
- **Async mode for ElegantOTA and NetWizard.** ESP-DASH and WebSerial only run on `ESPAsyncWebServer`. ElegantOTA and NetWizard default to the core `WebServer`, so enable their async mode by setting `ELEGANTOTA_USE_ASYNC_WEBSERVER=1` and `NETWIZARD_USE_ASYNC_WEBSERVER=1`. See [ElegantOTA async mode](/docs/elegantota/getting-started/async-mode) and [NetWizard async mode](/docs/netwizard/getting-started/async-mode).
- **One copy of each dependency.** Install a single copy of `ESPAsyncWebServer` and `AsyncTCP` (ESP32) or `RPAsyncTCP` (RP2040/RP2350) whose version satisfies the highest minimum listed on the installation page of each library you use. Do not install two forks of `ESPAsyncWebServer` side by side.
- **A board that every library supports.** ESP32 is supported by all four libraries. Check each library's supported boards before targeting RP2040, RP2350 or ESP8266: for example, ESP-DASH v5 and NetWizard do not support ESP8266.
## Default paths
Each library registers its own routes on the shared server. The defaults do not collide, except for ESP-DASH and the NetWizard portal, which both use `/`:
| Library | Default path | How to change it |
| --- | --- | --- |
| ESP-DASH | `/` | Pass a URI to the constructor: `ESPDash dashboard(server, "/dashboard", true);` ([custom URI](/docs/espdash/v5/features/custom-uri)) |
| ElegantOTA | `/update` | Fixed |
| WebSerial | `/webserial` | Pass a path to `begin()`: `WebSerial.begin(&server, "/terminal");` |
| NetWizard | `/` (captive portal, access point clients only) | Fixed |
When NetWizard is part of the project, serve ESP-DASH at `/dashboard` and add `server.rewrite("/", "/dashboard").setFilter(ON_STA_FILTER);` so that clients on the local network still see the dashboard at the device's root URL. See [NetWizard with ESP-DASH](/docs/netwizard/getting-started/using-with-espdash).
## Example
The sketch below combines all four libraries on an ESP32. Build it with `-D ELEGANTOTA_USE_ASYNC_WEBSERVER=1 -D NETWIZARD_USE_ASYNC_WEBSERVER=1`, or set both macros in the library headers as described on the async mode pages.
```cpp title="main.cpp"
#include
#include
#include
#include
#include // NetWizard Pro:
#include
#include // ElegantOTA Pro:
#include
AsyncWebServer server(80);
// WiFi provisioning: captive portal at / for access point clients
NetWizard NW(&server);
// Dashboard at /dashboard, so it does not conflict with the portal
ESPDash dashboard(server, "/dashboard", true);
dash::TemperatureCard temperature(dashboard, "Temperature");
unsigned long lastUpdate = 0;
void setup() {
Serial.begin(115200);
// Connect to the saved network, or start the captive portal
NW.setStrategy(NetWizardStrategy::BLOCKING);
NW.autoConnect("My Device", "");
// Over-the-air updates at /update
ElegantOTA.begin(&server);
// Remote serial terminal at /webserial
WebSerial.begin(&server);
WebSerial.onMessage([](const String& msg) {
Serial.println(msg);
});
// Show the dashboard at / for clients on the local network
server.rewrite("/", "/dashboard").setFilter(ON_STA_FILTER);
server.begin();
}
void loop() {
NW.loop();
ElegantOTA.loop();
WebSerial.loop();
if (millis() - lastUpdate > 3000) {
lastUpdate = millis();
temperature.setValue((int)random(0, 50));
dashboard.sendUpdates();
WebSerial.println("Dashboard updated");
}
}
```
Each library's `loop()` method must be called on every iteration, and `loop()` must not block, so that the portal, OTA updates and buffered terminal output keep running alongside the dashboard.
# AI Tools (/docs/espdash/v4/ai-tools)
> Use the ESP-DASH documentation from AI coding assistants through the MCP server, llms.txt and Markdown page exports.
Library: ESP-DASH v4.x.x
The ESP-DASH documentation is available in machine-readable formats so that AI coding assistants can answer questions and generate code from the current API instead of outdated training data.
## Ask AI
Select **Ask AI** at the bottom of any documentation page to open the documentation assistant. It searches these pages before answering and links to the sources it used. Answers are grounded in the documentation only; verify generated code against the referenced pages.
## MCP server
The documentation is served as a [Model Context Protocol](https://modelcontextprotocol.io) server over Streamable HTTP. No authentication is required. One server covers every SOFTT library (ESP-DASH, ElegantOTA, NetWizard and WebSerial); pass `library: "espdash"` to limit results to ESP-DASH.
```text
https://docs.softt.io/api/mcp
```
The server exposes three read-only tools:
| Tool | Description |
| --- | --- |
| `search_docs` | Full-text search across the documentation. Accepts `query`, an optional `library` (`espdash`, `elegantota`, `netwizard`, `webserial` or `all`), an optional `version` for ESP-DASH (`v5`, `v4` or `all`) and `limit`. |
| `get_page` | Returns the complete Markdown of a page, such as `/docs/espdash/v4/cards/slider`. |
| `list_pages` | Lists pages with their title, description and URL, filtered by `library` and `version`. |
### Connect a client
```bash
claude mcp add --transport http softt https://docs.softt.io/api/mcp
```
Add the server to `.cursor/mcp.json` in your project, or to `~/.cursor/mcp.json` for all projects:
```json title=".cursor/mcp.json"
{
"mcpServers": {
"softt": {
"url": "https://docs.softt.io/api/mcp"
}
}
}
```
Add the server to `.vscode/mcp.json` in your workspace:
```json title=".vscode/mcp.json"
{
"servers": {
"softt": {
"type": "http",
"url": "https://docs.softt.io/api/mcp"
}
}
}
```
Clients that support Streamable HTTP connect directly to the server URL. For clients that only support stdio, use the [`mcp-remote`](https://www.npmjs.com/package/mcp-remote) bridge:
```json
{
"softt": {
"command": "npx",
"args": ["-y", "mcp-remote", "https://docs.softt.io/api/mcp"]
}
}
```
Once connected, ask your assistant questions such as "Add an ESP-DASH v4 slider card that controls LED brightness" and it will retrieve the relevant pages before writing code.
## llms.txt
The site publishes [llms.txt](https://llmstxt.org) files for tools that ingest documentation directly:
| URL | Contents |
| --- | --- |
| [`/llms.txt`](/llms.txt) | Index of every page with its title, description and link. |
| [`/llms-full.txt`](/llms-full.txt) | The complete documentation of every library and version as a single Markdown file. |
## Markdown pages
Every page is also available as Markdown:
- Append `.md` to a page URL, for example [`/docs/espdash/v4/cards/slider.md`](/docs/espdash/v4/cards/slider.md).
- Requests with an `Accept: text/markdown` header receive Markdown instead of HTML.
- Use **Copy Markdown** at the top of a page to copy it to the clipboard, or **Open** to send it to an assistant such as ChatGPT or Claude.
# Branding (/docs/espdash/v4/branding)
> Replace the default ESP-DASH Pro v4 dashboard logo with your own image by editing the logo byte array in the library source.
Library: ESP-DASH v4.x.x
Availability: ESP-DASH Pro only
Branding refers to the logo displayed on the dashboard. You can replace the default logo by defining your image as a byte array in the `logo.h` and `logo.cpp` files of the ESP-DASH Pro library source, without modifying any HTML or CSS.
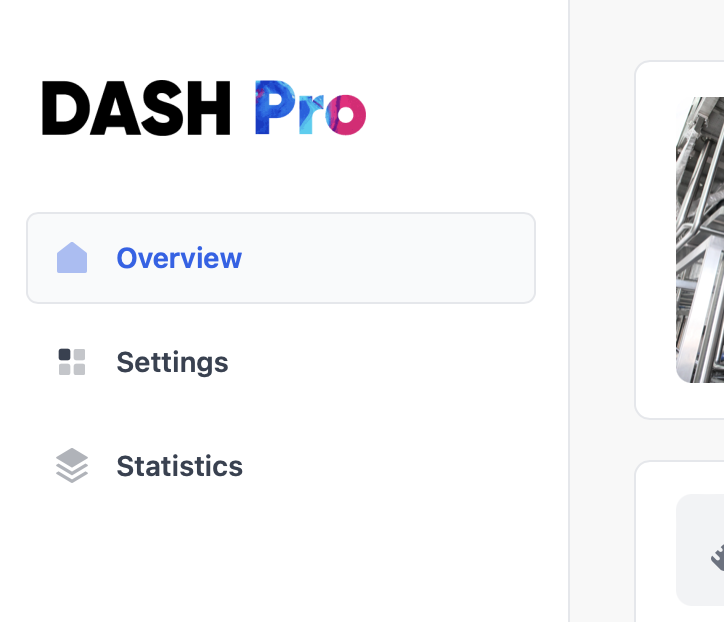
## Add a custom logo
### Prepare the logo
Create or obtain the logo image. SVG is recommended; PNG and JPEG are also supported. Optimize the image to keep the file size small, as it is stored in flash.
### Convert the logo to a byte array
1. Open the [File2Raw utility](https://file2raw.labrat.one/), which converts files into C++ byte arrays.
2. Select your logo file.
3. Enable **Gzip Compress** and **Use PROGMEM (Arduino)**.
4. Click **Convert**.
### Modify logo.h
1. Open `logo.h` in the ESP-DASH Pro library source.
2. Locate the `DASH_LOGO` declaration:
```cpp
extern const uint8_t DASH_LOGO[];
```
3. Set the length of the `DASH_LOGO` array to the length of your logo's byte array.
4. Set `DASH_LOGO_MIME` to the MIME type of your image. The default is `image/png`; change it if your logo uses another format, for example `image/jpeg` or `image/svg+xml`.
5. Set `DASH_LOGO_WIDTH` and `DASH_LOGO_HEIGHT` to the size at which the logo is displayed on the dashboard.
### Modify logo.cpp
1. Open `logo.cpp` in the ESP-DASH Pro library source.
2. Replace the contents of the `DASH_LOGO` array with the byte array generated by File2Raw.
### Upload the firmware
Compile your sketch with the modified ESP-DASH Pro library and upload it to your device. The dashboard now displays your logo.
Logos and other branding elements may be protected by copyright and trademark law. Make sure you have the rights or permissions required to use them in your project.
# Air Card (/docs/espdash/v4/cards/air)
> Display air pressure, wind speed and similar readings with an air icon on the ESP-DASH Pro v4 dashboard.
Library: ESP-DASH v4.x.x
Availability: ESP-DASH Pro only
The air card displays a value next to an air icon, with an optional unit symbol. Use it for wind speed, air pressure or similar measurements.
## Constructor
```cpp
Card air(&dashboard, AIR_CARD, "Wind Speed", "km/h");
```
## Methods
### update()
Sets the displayed value. Call `dashboard.sendUpdates()` afterwards to push the change to connected clients.
```cpp
air.update(int value);
air.update(float value);
air.update(const String &value);
```
Pass a second `const char* symbol` argument to change the symbol at the same time:
```cpp
air.update(value, "m/s");
```
## Example
```cpp title="main.cpp"
#include
#if defined(ESP8266)
#include
#include
#elif defined(ESP32)
#include
#include
#endif
#include
#include
const char* ssid = "YOUR_SSID";
const char* password = "YOUR_PASSWORD";
AsyncWebServer server(80);
ESPDash dashboard(&server);
Card air(&dashboard, AIR_CARD, "Wind Speed", "km/h");
void setup() {
Serial.begin(115200);
WiFi.mode(WIFI_STA);
WiFi.begin(ssid, password);
if (WiFi.waitForConnectResult() != WL_CONNECTED) {
Serial.println("WiFi connection failed");
return;
}
Serial.print("IP address: ");
Serial.println(WiFi.localIP());
server.begin();
}
void loop() {
static unsigned long lastUpdate = 0;
if (millis() - lastUpdate > 3000) {
lastUpdate = millis();
air.update((int)random(0, 100));
dashboard.sendUpdates();
}
}
```
# Color Picker Card (/docs/espdash/v4/cards/color-picker)
> Let users select a color and receive it as a hex string on the ESP-DASH Pro v4 dashboard.
Library: ESP-DASH v4.x.x
Availability: ESP-DASH Pro only
The color picker card lets the user select a color and returns it as a hex color string. Use it to set LED colors, display themes and similar parameters. For background on hex color notation, see [HTML hex colors](https://www.w3schools.com/html/html_colors_hex.asp).
## Constructor
```cpp
Card colorPicker(&dashboard, COLOR_PICKER_CARD, "LED Color");
```
## Callback
The callback fires when the user selects a color on the dashboard. `hex` is the hex string of the selected color.
Call `update()` with the received value and then `dashboard.sendUpdates()` inside the callback. Otherwise the dashboard does not register the input and the card remains in its waiting state.
```cpp
colorPicker.attachCallback([&](const char* hex) {
Serial.println("Color: " + String(hex));
colorPicker.update(hex);
dashboard.sendUpdates();
});
```
## Methods
### update()
Sets the selected color using a hex color string. Call `dashboard.sendUpdates()` afterwards to push the change to connected clients.
```cpp
colorPicker.update(const char* value);
colorPicker.update(const String &value);
```
## Example
```cpp title="main.cpp"
#include
#if defined(ESP8266)
#include
#include
#elif defined(ESP32)
#include
#include
#endif
#include
#include
const char* ssid = "YOUR_SSID";
const char* password = "YOUR_PASSWORD";
AsyncWebServer server(80);
ESPDash dashboard(&server);
Card colorPicker(&dashboard, COLOR_PICKER_CARD, "LED Color");
void setup() {
Serial.begin(115200);
WiFi.mode(WIFI_STA);
WiFi.begin(ssid, password);
if (WiFi.waitForConnectResult() != WL_CONNECTED) {
Serial.println("WiFi connection failed");
return;
}
Serial.print("IP address: ");
Serial.println(WiFi.localIP());
colorPicker.attachCallback([&](const char* hex) {
Serial.println("Color: " + String(hex));
colorPicker.update(hex);
dashboard.sendUpdates();
});
server.begin();
}
void loop() {
// ...
}
```
# Dropdown Card (/docs/espdash/v4/cards/dropdown)
> Let users select one option from a comma-separated list of choices on the ESP-DASH Pro v4 dashboard.
Library: ESP-DASH v4.x.x
Availability: ESP-DASH Pro only
The dropdown card lets the user select one option from a list. Choices are defined as a single comma-separated (`,`) string, with no limit on their number.
## Constructor
```cpp
Card dropdown(&dashboard, DROPDOWN_CARD, "Mode", "Auto,Manual,Off");
```
## Callback
The callback fires when the user selects an option on the dashboard. `value` is the selected choice.
Call `update()` with the received value and then `dashboard.sendUpdates()` inside the callback. Otherwise the dashboard does not register the selection.
```cpp
dropdown.attachCallback([&](const char* value) {
Serial.println("Selected: " + String(value));
dropdown.update(value);
dashboard.sendUpdates();
});
```
## Methods
### update()
Sets the selected value:
```cpp
dropdown.update(const char* value);
```
Sets the selected value and replaces the list of choices:
```cpp
dropdown.update(const char* value, const char* choices);
```
Call `dashboard.sendUpdates()` afterwards to push the change to connected clients.
## Example
```cpp title="main.cpp"
#include
#if defined(ESP8266)
#include
#include
#elif defined(ESP32)
#include
#include
#endif
#include
#include
const char* ssid = "YOUR_SSID";
const char* password = "YOUR_PASSWORD";
AsyncWebServer server(80);
ESPDash dashboard(&server);
Card dropdown(&dashboard, DROPDOWN_CARD, "Mode", "Auto,Manual,Off");
void setup() {
Serial.begin(115200);
WiFi.mode(WIFI_STA);
WiFi.begin(ssid, password);
if (WiFi.waitForConnectResult() != WL_CONNECTED) {
Serial.println("WiFi connection failed");
return;
}
Serial.print("IP address: ");
Serial.println(WiFi.localIP());
dropdown.update("Auto");
dropdown.attachCallback([&](const char* value) {
Serial.println("Selected: " + String(value));
dropdown.update(value);
dashboard.sendUpdates();
});
server.begin();
}
void loop() {
// ...
}
```
# Energy Card (/docs/espdash/v4/cards/energy)
> Display power consumption and energy usage with an energy icon on the ESP-DASH Pro v4 dashboard.
Library: ESP-DASH v4.x.x
Availability: ESP-DASH Pro only
The energy card displays a value next to an energy icon, with an optional unit symbol. Use it for power consumption, energy usage or similar measurements.
## Constructor
```cpp
Card energy(&dashboard, ENERGY_CARD, "Power Consumption", "kWh");
```
## Methods
### update()
Sets the displayed value. Call `dashboard.sendUpdates()` afterwards to push the change to connected clients.
```cpp
energy.update(int value);
energy.update(float value);
energy.update(const String &value);
```
Pass a second `const char* symbol` argument to change the symbol at the same time:
```cpp
energy.update(value, "Wh");
```
## Example
```cpp title="main.cpp"
#include
#if defined(ESP8266)
#include
#include
#elif defined(ESP32)
#include
#include
#endif
#include
#include
const char* ssid = "YOUR_SSID";
const char* password = "YOUR_PASSWORD";
AsyncWebServer server(80);
ESPDash dashboard(&server);
Card energy(&dashboard, ENERGY_CARD, "Power Consumption", "kWh");
void setup() {
Serial.begin(115200);
WiFi.mode(WIFI_STA);
WiFi.begin(ssid, password);
if (WiFi.waitForConnectResult() != WL_CONNECTED) {
Serial.println("WiFi connection failed");
return;
}
Serial.print("IP address: ");
Serial.println(WiFi.localIP());
server.begin();
}
void loop() {
static unsigned long lastUpdate = 0;
if (millis() - lastUpdate > 3000) {
lastUpdate = millis();
energy.update((int)random(0, 100));
dashboard.sendUpdates();
}
}
```
# Generic Card (/docs/espdash/v4/cards/generic)
> Display any integer, float, boolean or string value on the ESP-DASH v4 dashboard with the generic card.
Library: ESP-DASH v4.x.x
The generic card displays an arbitrary value: integers, floats, booleans or strings. Use it for readings and states that do not fit one of the specialized cards.
## Constructor
```cpp
Card generic(&dashboard, GENERIC_CARD, "Generic");
```
## Methods
### update()
Sets the displayed value. Call `dashboard.sendUpdates()` afterwards to push the change to connected clients.
```cpp
generic.update(int value);
generic.update(float value);
generic.update(bool value);
generic.update(const char* value);
generic.update(const String &value);
```
Each overload also accepts a second `const char* symbol` argument that replaces the card's symbol:
```cpp
generic.update(value, "units");
```
## Example
```cpp title="main.cpp"
#include
#if defined(ESP8266)
#include
#include
#elif defined(ESP32)
#include
#include
#endif
#include
#include
const char* ssid = "YOUR_SSID";
const char* password = "YOUR_PASSWORD";
AsyncWebServer server(80);
ESPDash dashboard(&server);
Card generic(&dashboard, GENERIC_CARD, "Generic");
void setup() {
Serial.begin(115200);
WiFi.mode(WIFI_STA);
WiFi.begin(ssid, password);
if (WiFi.waitForConnectResult() != WL_CONNECTED) {
Serial.println("WiFi connection failed");
return;
}
Serial.print("IP address: ");
Serial.println(WiFi.localIP());
server.begin();
}
void loop() {
static unsigned long lastUpdate = 0;
if (millis() - lastUpdate > 3000) {
lastUpdate = millis();
generic.update((int)random(0, 100));
dashboard.sendUpdates();
}
}
```
# Humidity Card (/docs/espdash/v4/cards/humidity)
> Display humidity readings with a humidity icon and an optional unit symbol on the ESP-DASH v4 dashboard.
Library: ESP-DASH v4.x.x
The humidity card displays a value next to a humidity icon, with an optional unit symbol such as `%`.
## Constructor
```cpp
Card humidity(&dashboard, HUMIDITY_CARD, "Humidity", "%");
```
## Methods
### update()
Sets the displayed value. Call `dashboard.sendUpdates()` afterwards to push the change to connected clients.
```cpp
humidity.update(int value);
humidity.update(float value);
humidity.update(const char* value);
humidity.update(const String &value);
```
Each overload also accepts a second `const char* symbol` argument that replaces the card's symbol:
```cpp
humidity.update(value, "RH");
```
## Example
```cpp title="main.cpp"
#include
#if defined(ESP8266)
#include
#include
#elif defined(ESP32)
#include
#include
#endif
#include
#include
const char* ssid = "YOUR_SSID";
const char* password = "YOUR_PASSWORD";
AsyncWebServer server(80);
ESPDash dashboard(&server);
Card humidity(&dashboard, HUMIDITY_CARD, "Humidity", "%");
void setup() {
Serial.begin(115200);
WiFi.mode(WIFI_STA);
WiFi.begin(ssid, password);
if (WiFi.waitForConnectResult() != WL_CONNECTED) {
Serial.println("WiFi connection failed");
return;
}
Serial.print("IP address: ");
Serial.println(WiFi.localIP());
server.begin();
}
void loop() {
static unsigned long lastUpdate = 0;
if (millis() - lastUpdate > 3000) {
lastUpdate = millis();
humidity.update((int)random(30, 70));
dashboard.sendUpdates();
}
}
```
# Image Card (/docs/espdash/v4/cards/image)
> Display an image from a URL on the ESP-DASH Pro v4 dashboard with the image card.
Library: ESP-DASH v4.x.x
Availability: ESP-DASH Pro only
The image card displays an image loaded from a URL. Use it to show camera snapshots, diagrams or other remotely hosted images on the dashboard.
## Constructor
```cpp
Card image(&dashboard, IMAGE_CARD, "Camera", "lg");
```
## Methods
### update()
Sets the URL of the image to display. The card shows no image until a URL is set.
```cpp
image.update(const char* url);
```
Pass a second argument to change the image size at the same time. Supported sizes are `lg` and `xl`:
```cpp
image.update(const char* url, const char* size);
```
Call `dashboard.sendUpdates()` afterwards to push the change to connected clients.
## Example
```cpp title="main.cpp"
#include
#if defined(ESP8266)
#include
#include
#elif defined(ESP32)
#include
#include
#endif
#include
#include
const char* ssid = "YOUR_SSID";
const char* password = "YOUR_PASSWORD";
AsyncWebServer server(80);
ESPDash dashboard(&server);
Card image(&dashboard, IMAGE_CARD, "Camera", "lg");
void setup() {
Serial.begin(115200);
WiFi.mode(WIFI_STA);
WiFi.begin(ssid, password);
if (WiFi.waitForConnectResult() != WL_CONNECTED) {
Serial.println("WiFi connection failed");
return;
}
Serial.print("IP address: ");
Serial.println(WiFi.localIP());
image.update("https://picsum.photos/800/600");
server.begin();
}
void loop() {
// ...
}
```
# Joystick Card (/docs/espdash/v4/cards/joystick)
> Control devices with an on-screen joystick that reports direction or X/Y coordinates on the ESP-DASH Pro v4 dashboard.
Library: ESP-DASH v4.x.x
Availability: ESP-DASH Pro only
The joystick card provides an on-screen joystick and reports its movement through callbacks, either as a direction or as X/Y coordinates. Use it to drive motors, pan-tilt mounts or robots.
## Constructor
```cpp
Card joystick(&dashboard, JOYSTICK_CARD, "Joystick");
```
### Direction lock
By default, the joystick moves on both axes. To restrict it to a single axis, pass `lockX` or `lockY` as the fourth argument:
```cpp
Card joystickX(&dashboard, JOYSTICK_CARD, "Horizontal", "lockX");
Card joystickY(&dashboard, JOYSTICK_CARD, "Vertical", "lockY");
```
## Callback
The joystick card supports two callbacks, which you can register independently.
### Directional callback
Fires when the joystick moves and receives the active direction: `up`, `down`, `left`, `right` or `idle`.
```cpp
joystick.attachCallback([&](const char* direction) {
Serial.println("Direction: " + String(direction));
});
```
### Coordinates callback
Fires when the joystick moves and receives the position of the thumb. Both axes range from `-60` to `60`:
- X axis: `-60` is left, `60` is right.
- Y axis: `-60` is up, `60` is down.
```cpp
joystick.attachCallback([&](int8_t x, int8_t y) {
Serial.printf("X: %d, Y: %d\n", x, y);
});
```
## Example
```cpp title="main.cpp"
#include
#if defined(ESP8266)
#include
#include
#elif defined(ESP32)
#include
#include
#endif
#include
#include
const char* ssid = "YOUR_SSID";
const char* password = "YOUR_PASSWORD";
AsyncWebServer server(80);
ESPDash dashboard(&server);
Card joystick(&dashboard, JOYSTICK_CARD, "Joystick");
void setup() {
Serial.begin(115200);
WiFi.mode(WIFI_STA);
WiFi.begin(ssid, password);
if (WiFi.waitForConnectResult() != WL_CONNECTED) {
Serial.println("WiFi connection failed");
return;
}
Serial.print("IP address: ");
Serial.println(WiFi.localIP());
joystick.attachCallback([&](const char* direction) {
Serial.println("Direction: " + String(direction));
});
joystick.attachCallback([&](int8_t x, int8_t y) {
Serial.printf("X: %d, Y: %d\n", x, y);
});
server.begin();
}
void loop() {
// ...
}
```
## Notes
- The joystick card does not need `update()`, since no value is passed back to the dashboard.
# Link Card (/docs/espdash/v4/cards/link)
> Open a URL from the ESP-DASH Pro v4 dashboard when the user clicks the link card.
Library: ESP-DASH v4.x.x
Availability: ESP-DASH Pro only
The link card opens a URL when the user clicks it. Use it to link to external resources, documentation or other pages served by the device.
## Constructor
```cpp
Card link(&dashboard, LINK_CARD, "Documentation");
```
## Methods
### update()
Sets the URL that opens when the user clicks the card. The card has no target until a URL is set.
```cpp
link.update(const char* url);
```
Call `dashboard.sendUpdates()` afterwards to push the change to connected clients.
## Example
```cpp title="main.cpp"
#include
#if defined(ESP8266)
#include
#include
#elif defined(ESP32)
#include
#include
#endif
#include
#include
const char* ssid = "YOUR_SSID";
const char* password = "YOUR_PASSWORD";
AsyncWebServer server(80);
ESPDash dashboard(&server);
Card link(&dashboard, LINK_CARD, "Documentation");
void setup() {
Serial.begin(115200);
WiFi.mode(WIFI_STA);
WiFi.begin(ssid, password);
if (WiFi.waitForConnectResult() != WL_CONNECTED) {
Serial.println("WiFi connection failed");
return;
}
Serial.print("IP address: ");
Serial.println(WiFi.localIP());
link.update("https://espdash.pro");
server.begin();
}
void loop() {
// ...
}
```
# Password Card (/docs/espdash/v4/cards/password)
> Collect passwords and other secrets through a masked input field on the ESP-DASH Pro v4 dashboard.
Library: ESP-DASH v4.x.x
Availability: ESP-DASH Pro only
The password card collects sensitive text, such as passwords or secrets. The dashboard masks the input, and the value is not sent back to the dashboard.
## Constructor
```cpp
Card pass(&dashboard, PASSWORD_CARD, "WiFi Password");
```
## Callback
The callback fires when the user submits a value on the dashboard. `value` is the submitted string. Because the value is never displayed on the dashboard, no `update()` call is required.
```cpp
pass.attachCallback([&](const char* value) {
// Store or apply the value
});
```
## Example
```cpp title="main.cpp"
#include
#if defined(ESP8266)
#include
#include
#elif defined(ESP32)
#include
#include
#endif
#include
#include
const char* ssid = "YOUR_SSID";
const char* password = "YOUR_PASSWORD";
AsyncWebServer server(80);
ESPDash dashboard(&server);
String storedPassword;
Card pass(&dashboard, PASSWORD_CARD, "WiFi Password");
void setup() {
Serial.begin(115200);
WiFi.mode(WIFI_STA);
WiFi.begin(ssid, password);
if (WiFi.waitForConnectResult() != WL_CONNECTED) {
Serial.println("WiFi connection failed");
return;
}
Serial.print("IP address: ");
Serial.println(WiFi.localIP());
pass.attachCallback([&](const char* value) {
storedPassword = value;
Serial.println("Password received");
});
server.begin();
}
void loop() {
// ...
}
```
## Notes
- The password card does not need `update()`, since its value is not passed back to the dashboard.
# Progress Bar Card (/docs/espdash/v4/cards/progress-bar)
> Show a value within a fixed integer or float range as a horizontal progress bar on the ESP-DASH v4 dashboard.
Library: ESP-DASH v4.x.x
The progress bar card renders a horizontal bar that represents a value within a fixed range. Use it to show completion, levels or utilization.
## Constructor
Pass the `min` and `max` of the range to display.
```cpp
Card progress(&dashboard, PROGRESS_CARD, "Progress", "", 0, 255);
```
For a fractional range, use the float overload. This overload has no default arguments: pass `symbol` explicitly, and pass `min`, `max` and `step` as `float` values.
```cpp
Card progress(&dashboard, PROGRESS_CARD, "Progress", "", 0.0f, 1.0f, 0.01f);
```
## Methods
### update()
Sets the current value. Call `dashboard.sendUpdates()` afterwards to push the change to connected clients.
```cpp
progress.update(int value);
progress.update(float value);
```
Pass a second `const char* symbol` argument to change the symbol at the same time:
```cpp
progress.update(244, "%");
```
## Example
```cpp title="main.cpp"
#include
#if defined(ESP8266)
#include
#include
#elif defined(ESP32)
#include
#include
#endif
#include
#include
const char* ssid = "YOUR_SSID";
const char* password = "YOUR_PASSWORD";
AsyncWebServer server(80);
ESPDash dashboard(&server);
Card progress(&dashboard, PROGRESS_CARD, "Progress", "", 0, 255);
void setup() {
Serial.begin(115200);
WiFi.mode(WIFI_STA);
WiFi.begin(ssid, password);
if (WiFi.waitForConnectResult() != WL_CONNECTED) {
Serial.println("WiFi connection failed");
return;
}
Serial.print("IP address: ");
Serial.println(WiFi.localIP());
server.begin();
}
void loop() {
static unsigned long lastUpdate = 0;
if (millis() - lastUpdate > 3000) {
lastUpdate = millis();
progress.update((int)random(0, 255));
dashboard.sendUpdates();
}
}
```
# Push Button Card (/docs/espdash/v4/cards/push-button)
> Trigger a stateless action from the ESP-DASH Pro v4 dashboard with the push button card and its callback.
Library: ESP-DASH v4.x.x
Availability: ESP-DASH Pro only
The push button card triggers a callback each time the user clicks it. It is stateless, which makes it suitable for one-shot actions such as restarting a device or starting a task.
## Constructor
```cpp
Card pushButton(&dashboard, PUSH_BUTTON_CARD, "Restart");
```
## Callback
The callback takes no arguments and fires on every click. Because the button has no state, no `update()` or `dashboard.sendUpdates()` call is required.
```cpp
pushButton.attachCallback([&]() {
Serial.println("Push button clicked");
});
```
## Example
```cpp title="main.cpp"
#include
#if defined(ESP8266)
#include
#include
#elif defined(ESP32)
#include
#include
#endif
#include
#include
const char* ssid = "YOUR_SSID";
const char* password = "YOUR_PASSWORD";
AsyncWebServer server(80);
ESPDash dashboard(&server);
bool restartRequested = false;
Card pushButton(&dashboard, PUSH_BUTTON_CARD, "Restart");
void setup() {
Serial.begin(115200);
WiFi.mode(WIFI_STA);
WiFi.begin(ssid, password);
if (WiFi.waitForConnectResult() != WL_CONNECTED) {
Serial.println("WiFi connection failed");
return;
}
Serial.print("IP address: ");
Serial.println(WiFi.localIP());
pushButton.attachCallback([&]() {
restartRequested = true;
});
server.begin();
}
void loop() {
if (restartRequested) {
delay(100);
ESP.restart();
}
}
```
## Notes
- The push button card does not need `update()`, since no value is passed back to the dashboard.
# Slider Card (/docs/espdash/v4/cards/slider)
> Select integer or float values within a defined range from the ESP-DASH v4 dashboard with the slider card.
Library: ESP-DASH v4.x.x
The slider card lets the user select a numeric value within a defined range. Use it for adjustable parameters such as brightness, speed or setpoints.
## Constructor
Pass the `min` and `max` of the range, and optionally the `step` size:
```cpp
Card slider(&dashboard, SLIDER_CARD, "Brightness", "", 0, 255, 1);
```
For a fractional range, use the float overload. This overload has no default arguments: pass `symbol` explicitly, and pass `min`, `max` and `step` as `float` values.
```cpp
Card slider(&dashboard, SLIDER_CARD, "Setpoint", "°C", 15.0f, 30.0f, 0.5f);
```
## Callback
```cpp
void attachCallback(std::function cb);
void attachCallbackF(std::function cb);
```
The callback fires when the user moves the slider on the dashboard. `value` is the newly selected value.
- For integer sliders, use `attachCallback()`. The value is passed as `int`.
- For sliders created with the float constructor, use `attachCallbackF()`. The value is passed as `float`.
Call `update()` with the received value and then `dashboard.sendUpdates()` inside the callback. Otherwise the dashboard does not register the new value.
```cpp
slider.attachCallback([&](int value) {
Serial.println("Slider: " + String(value));
slider.update(value);
dashboard.sendUpdates();
});
```
For a float slider:
```cpp
slider.attachCallbackF([&](float value) {
Serial.println("Slider: " + String(value));
slider.update(value);
dashboard.sendUpdates();
});
```
## Methods
### update()
Sets the slider position. Call `dashboard.sendUpdates()` afterwards to push the change to connected clients.
```cpp
slider.update(int value);
slider.update(float value);
```
Pass a second `const char* symbol` argument to change the symbol at the same time:
```cpp
slider.update(244, "%");
```
## Example
```cpp title="main.cpp"
#include
#if defined(ESP8266)
#include
#include
#elif defined(ESP32)
#include
#include
#endif
#include
#include
const char* ssid = "YOUR_SSID";
const char* password = "YOUR_PASSWORD";
AsyncWebServer server(80);
ESPDash dashboard(&server);
const int LED_PIN = 2;
Card slider(&dashboard, SLIDER_CARD, "Brightness", "", 0, 255, 1);
void setup() {
Serial.begin(115200);
WiFi.mode(WIFI_STA);
WiFi.begin(ssid, password);
if (WiFi.waitForConnectResult() != WL_CONNECTED) {
Serial.println("WiFi connection failed");
return;
}
Serial.print("IP address: ");
Serial.println(WiFi.localIP());
pinMode(LED_PIN, OUTPUT);
slider.attachCallback([&](int value) {
analogWrite(LED_PIN, value);
slider.update(value);
dashboard.sendUpdates();
});
server.begin();
}
void loop() {
// ...
}
```
## Notes
- An integer slider passes its value to `attachCallback()`. If you construct the slider with the float overload but register only `attachCallback()`, the value is truncated to `int`.
# Status Card (/docs/espdash/v4/cards/status)
> Display a message with an idle, success, warning or danger indicator on the ESP-DASH v4 dashboard.
Library: ESP-DASH v4.x.x
The status card displays a message together with one of four status indicators: idle, success, warning or danger. Use it to report system health or the state of a process.
## Status constants
| Constant | Indicator |
| --- | --- |
| `DASH_STATUS_IDLE` | Idle (grey) |
| `DASH_STATUS_SUCCESS` | Success (green) |
| `DASH_STATUS_WARNING` | Warning (yellow) |
| `DASH_STATUS_DANGER` | Danger (red) |
## Constructor
```cpp
Card status(&dashboard, STATUS_CARD, "System Status", DASH_STATUS_SUCCESS);
```
## Methods
### update()
Sets the message:
```cpp
status.update("All systems operational");
```
Sets the message and the status at the same time:
```cpp
status.update("Sensor offline", DASH_STATUS_DANGER);
```
Call `dashboard.sendUpdates()` afterwards to push the change to connected clients.
## Example
```cpp title="main.cpp"
#include
#if defined(ESP8266)
#include
#include
#elif defined(ESP32)
#include
#include
#endif
#include
#include
const char* ssid = "YOUR_SSID";
const char* password = "YOUR_PASSWORD";
AsyncWebServer server(80);
ESPDash dashboard(&server);
Card status(&dashboard, STATUS_CARD, "System Status", DASH_STATUS_IDLE);
void setup() {
Serial.begin(115200);
WiFi.mode(WIFI_STA);
WiFi.begin(ssid, password);
if (WiFi.waitForConnectResult() != WL_CONNECTED) {
Serial.println("WiFi connection failed");
return;
}
Serial.print("IP address: ");
Serial.println(WiFi.localIP());
status.update("Running", DASH_STATUS_SUCCESS);
server.begin();
}
void loop() {
static unsigned long lastUpdate = 0;
if (millis() - lastUpdate > 3000) {
lastUpdate = millis();
if (WiFi.RSSI() < -80) {
status.update("Weak WiFi signal", DASH_STATUS_WARNING);
} else {
status.update("Running", DASH_STATUS_SUCCESS);
}
dashboard.sendUpdates();
}
}
```
# Temperature Card (/docs/espdash/v4/cards/temperature)
> Display temperature readings with a temperature icon and an optional unit symbol on the ESP-DASH v4 dashboard.
Library: ESP-DASH v4.x.x
The temperature card displays a value next to a temperature icon, with an optional unit symbol such as `°C` or `°F`.
## Constructor
```cpp
Card temperature(&dashboard, TEMPERATURE_CARD, "Temperature", "°C");
```
## Methods
### update()
Sets the displayed value. Call `dashboard.sendUpdates()` afterwards to push the change to connected clients.
```cpp
temperature.update(int value);
temperature.update(float value);
temperature.update(const char* value);
temperature.update(const String &value);
```
Each overload also accepts a second `const char* symbol` argument that replaces the card's symbol:
```cpp
temperature.update(value, "°F");
```
## Example
```cpp title="main.cpp"
#include
#if defined(ESP8266)
#include
#include
#elif defined(ESP32)
#include
#include
#endif
#include
#include
const char* ssid = "YOUR_SSID";
const char* password = "YOUR_PASSWORD";
AsyncWebServer server(80);
ESPDash dashboard(&server);
Card temperature(&dashboard, TEMPERATURE_CARD, "Temperature", "°C");
void setup() {
Serial.begin(115200);
WiFi.mode(WIFI_STA);
WiFi.begin(ssid, password);
if (WiFi.waitForConnectResult() != WL_CONNECTED) {
Serial.println("WiFi connection failed");
return;
}
Serial.print("IP address: ");
Serial.println(WiFi.localIP());
server.begin();
}
void loop() {
static unsigned long lastUpdate = 0;
if (millis() - lastUpdate > 3000) {
lastUpdate = millis();
temperature.update(22.5f + random(0, 50) / 10.0f);
dashboard.sendUpdates();
}
}
```
# Text Input Card (/docs/espdash/v4/cards/text-input)
> Collect text input such as credentials or identifiers from the ESP-DASH Pro v4 dashboard with the text input card.
Library: ESP-DASH v4.x.x
Availability: ESP-DASH Pro only
The text input card collects a string entered by the user on the dashboard. Use it for configurable values such as WiFi credentials, device names or user IDs.
## Constructor
```cpp
Card text(&dashboard, TEXT_INPUT_CARD, "User Email");
```
## Callback
The callback fires when the user submits text on the dashboard. `value` is the submitted string.
Call `update()` with the received value and then `dashboard.sendUpdates()` inside the callback. Otherwise the dashboard does not register the input and the card remains in its waiting state.
```cpp
text.attachCallback([&](const char* value) {
Serial.println("Text input: " + String(value));
text.update(value);
dashboard.sendUpdates();
});
```
## Methods
### update()
Sets the text shown in the card. Call `dashboard.sendUpdates()` afterwards to push the change to connected clients.
```cpp
text.update(const char* value);
text.update(const String &value);
```
## Example
```cpp title="main.cpp"
#include
#if defined(ESP8266)
#include
#include
#elif defined(ESP32)
#include
#include
#endif
#include
#include
const char* ssid = "YOUR_SSID";
const char* password = "YOUR_PASSWORD";
AsyncWebServer server(80);
ESPDash dashboard(&server);
Card text(&dashboard, TEXT_INPUT_CARD, "User Email");
void setup() {
Serial.begin(115200);
WiFi.mode(WIFI_STA);
WiFi.begin(ssid, password);
if (WiFi.waitForConnectResult() != WL_CONNECTED) {
Serial.println("WiFi connection failed");
return;
}
Serial.print("IP address: ");
Serial.println(WiFi.localIP());
text.attachCallback([&](const char* value) {
Serial.println("Text input: " + String(value));
text.update(value);
dashboard.sendUpdates();
});
server.begin();
}
void loop() {
// ...
}
```
# Time Sync Card (/docs/espdash/v4/cards/time-sync)
> Synchronize the device clock with the browser time from the ESP-DASH Pro v4 dashboard.
Library: ESP-DASH v4.x.x
Availability: ESP-DASH Pro only
The time sync card sends the current time from the browser to the device. Use it to set the device clock from the dashboard.
The time is taken from the browser. Use this card only when the browser and the device are in the same timezone.
## Constructor
```cpp
Card timeSync(&dashboard, TIME_SYNC_CARD, "Time Sync");
```
## Callback
The callback fires when the user triggers a sync on the dashboard. `value` contains the time reported by the browser.
```cpp
timeSync.attachCallback([&](const char* value) {
Serial.println("Time sync: " + String(value));
});
```
## Example
```cpp title="main.cpp"
#include
#if defined(ESP8266)
#include
#include
#elif defined(ESP32)
#include
#include
#endif
#include
#include
const char* ssid = "YOUR_SSID";
const char* password = "YOUR_PASSWORD";
AsyncWebServer server(80);
ESPDash dashboard(&server);
Card timeSync(&dashboard, TIME_SYNC_CARD, "Time Sync");
void setup() {
Serial.begin(115200);
WiFi.mode(WIFI_STA);
WiFi.begin(ssid, password);
if (WiFi.waitForConnectResult() != WL_CONNECTED) {
Serial.println("WiFi connection failed");
return;
}
Serial.print("IP address: ");
Serial.println(WiFi.localIP());
timeSync.attachCallback([&](const char* value) {
Serial.println("Time sync: " + String(value));
});
server.begin();
}
void loop() {
// ...
}
```
## Notes
- The time sync card does not need `update()`.
# Toggle Button Card (/docs/espdash/v4/cards/toggle-button)
> Switch between on and off states from the ESP-DASH v4 dashboard with the toggle button card and its callback.
Library: ESP-DASH v4.x.x
The toggle button card switches between two states, `0` (off) and `1` (on). Use it to turn outputs such as relays or LEDs on and off from the dashboard.
## Constructor
```cpp
Card button(&dashboard, BUTTON_CARD, "Light");
```
## Callback
```cpp
void attachCallback(std::function cb);
```
The callback fires when the user clicks the button on the dashboard. `value` is the requested state, which is the inverse of the current state: if the button is `0`, a click invokes the callback with `1`.
Call `update()` with the received value and then `dashboard.sendUpdates()` inside the callback. Otherwise the dashboard does not register the new state.
```cpp
button.attachCallback([&](int value) {
Serial.println("Button: " + String(value == 1 ? "on" : "off"));
button.update(value);
dashboard.sendUpdates();
});
```
## Methods
### update()
Sets the button state. Call `dashboard.sendUpdates()` afterwards to push the change to connected clients.
```cpp
button.update(1); // on
button.update(0); // off
```
`update(bool value)` is also available.
## Example
```cpp title="main.cpp"
#include
#if defined(ESP8266)
#include
#include
#elif defined(ESP32)
#include
#include
#endif
#include
#include
const char* ssid = "YOUR_SSID";
const char* password = "YOUR_PASSWORD";
AsyncWebServer server(80);
ESPDash dashboard(&server);
const int LED_PIN = 2;
Card button(&dashboard, BUTTON_CARD, "Light");
void setup() {
Serial.begin(115200);
WiFi.mode(WIFI_STA);
WiFi.begin(ssid, password);
if (WiFi.waitForConnectResult() != WL_CONNECTED) {
Serial.println("WiFi connection failed");
return;
}
Serial.print("IP address: ");
Serial.println(WiFi.localIP());
pinMode(LED_PIN, OUTPUT);
button.attachCallback([&](int value) {
digitalWrite(LED_PIN, value == 1 ? HIGH : LOW);
button.update(value);
dashboard.sendUpdates();
});
server.begin();
}
void loop() {
// ...
}
```
# Week Selector Card (/docs/espdash/v4/cards/week-selector)
> Let users select days of the week as a comma-separated list on the ESP-DASH Pro v4 dashboard.
Library: ESP-DASH v4.x.x
Availability: ESP-DASH Pro only
The week selector card lets the user select days of the week. Its value is a comma-separated (`,`) string of the selected days, such as `mon,wed,fri`. Use it for schedules and recurring timers.
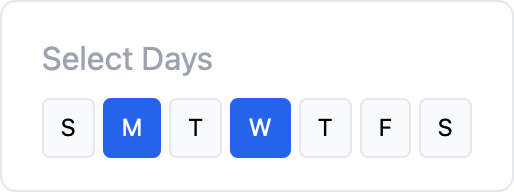
## Constructor
```cpp
Card week(&dashboard, WEEK_SELECTOR_CARD, "Select Days");
```
## Callback
The callback fires whenever the user selects or deselects a day. `days` is a comma-separated list of the selected days, using the values `mon`, `tue`, `wed`, `thu`, `fri`, `sat` and `sun`.
Call `update()` with the received value and then `dashboard.sendUpdates()` inside the callback. Otherwise the dashboard does not register the input and the card remains in its waiting state.
```cpp
week.attachCallback([&](const char* days) {
Serial.println("Selected days: " + String(days));
week.update(days);
dashboard.sendUpdates();
});
```
## Methods
### update()
Sets the selected days from a comma-separated list. The order of days does not matter: `tue,mon,thu` selects Monday, Tuesday and Thursday.
```cpp
week.update(const char* value);
week.update(const String &value);
```
Call `dashboard.sendUpdates()` afterwards to push the change to connected clients.
## Example
```cpp title="main.cpp"
#include
#if defined(ESP8266)
#include
#include
#elif defined(ESP32)
#include
#include
#endif
#include
#include
const char* ssid = "YOUR_SSID";
const char* password = "YOUR_PASSWORD";
AsyncWebServer server(80);
ESPDash dashboard(&server);
Card week(&dashboard, WEEK_SELECTOR_CARD, "Select Days");
void setup() {
Serial.begin(115200);
WiFi.mode(WIFI_STA);
WiFi.begin(ssid, password);
if (WiFi.waitForConnectResult() != WL_CONNECTED) {
Serial.println("WiFi connection failed");
return;
}
Serial.print("IP address: ");
Serial.println(WiFi.localIP());
week.update("mon,tue,wed,thu,fri");
week.attachCallback([&](const char* days) {
Serial.println("Selected days: " + String(days));
week.update(days);
dashboard.sendUpdates();
});
server.begin();
}
void loop() {
// ...
}
```
# Area Chart (/docs/espdash/v4/charts/area)
> Create a area chart in ESP-DASH v4 and update its X-axis and Y-axis data with updateX() and updateY().
Library: ESP-DASH v4.x.x
Availability: ESP-DASH Pro only
An area chart plots a series of values as a line with the region below it filled, which emphasizes the magnitude of a trend over time.
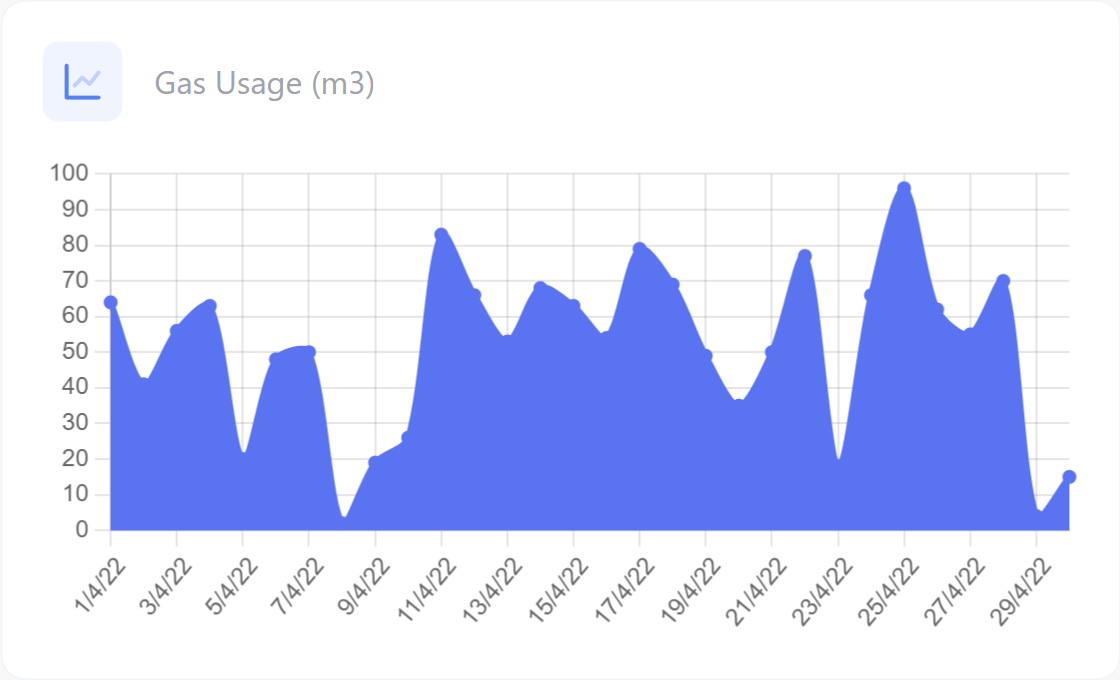
## Constructor
```cpp
Chart chart1(&dashboard, AREA_CHART, "Chart Name");
```
## Methods
Declare the axis arrays in global scope, or otherwise keep them in memory for the lifetime of the chart. The chart references the arrays you pass to `updateX()` and `updateY()`; they must not be freed or go out of scope.
### updateX()
Sets the X-axis data (labels) of the chart.
```cpp
String XAxis[] = {"Sun", "Mon", "Tue", "Wed", "Thu", "Fri", "Sat"};
chart1.updateX(XAxis, 7);
```
The following overloads are available:
```cpp
void updateX(int arr_x[], size_t x_size);
void updateX(float arr_x[], size_t x_size);
void updateX(String arr_x[], size_t x_size);
void updateX(const char* arr_x[], size_t x_size);
```
### updateY()
Sets the Y-axis data (values) of the chart.
```cpp
int YAxis[] = {0, 0, 0, 0, 0, 0, 0};
chart1.updateY(YAxis, 7);
```
The following overloads are available:
```cpp
void updateY(int arr_y[], size_t y_size);
void updateY(float arr_y[], size_t y_size);
```
## Example
The X-axis labels usually change rarely, so set them once in `setup()`. Update the Y-axis values whenever new data is available, then call `dashboard.sendUpdates()`.
```cpp title="main.cpp"
// ...
AsyncWebServer server(80);
ESPDash dashboard(&server);
/* Axis data in global scope */
String XAxis[] = {"Sun", "Mon", "Tue", "Wed", "Thu", "Fri", "Sat"};
int YAxis[] = {0, 0, 0, 0, 0, 0, 0};
Chart trafficChart(&dashboard, AREA_CHART, "Network Traffic");
void setup() {
// ...
/* Set the X-axis once */
trafficChart.updateX(XAxis, 7);
server.begin();
}
void loop() {
/* Example data */
for (int i = 0; i < 7; i++) {
YAxis[i] = (int)random(0, 100);
}
trafficChart.updateY(YAxis, 7);
dashboard.sendUpdates();
delay(3000);
}
```
# Bar Chart (/docs/espdash/v4/charts/bar)
> Create a bar chart in ESP-DASH v4 and update its X-axis and Y-axis data with updateX() and updateY().
Library: ESP-DASH v4.x.x
A bar chart plots a series of values as vertical bars against labeled categories, for example energy usage per day of the week.
`BAR_CHART` is the only chart type available in ESP-DASH Lite. Line, area and pie charts are available in ESP-DASH Pro.
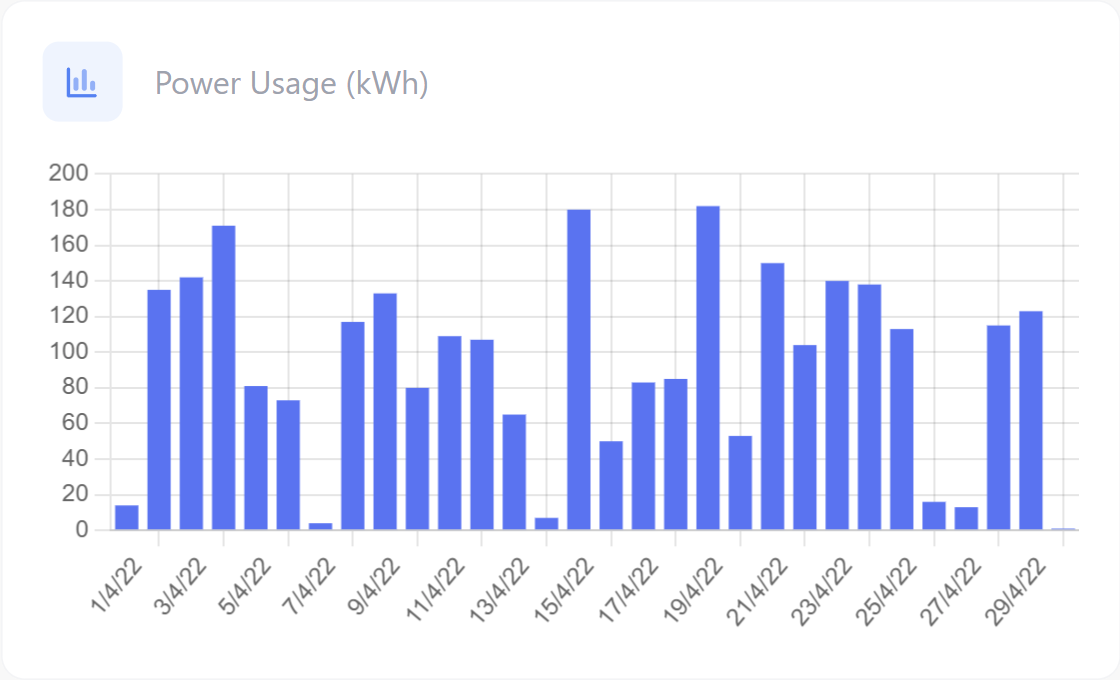
## Constructor
```cpp
Chart chart1(&dashboard, BAR_CHART, "Chart Name");
```
## Methods
Declare the axis arrays in global scope, or otherwise keep them in memory for the lifetime of the chart. The chart references the arrays you pass to `updateX()` and `updateY()`; they must not be freed or go out of scope.
### updateX()
Sets the X-axis data (labels) of the chart.
```cpp
String XAxis[] = {"Sun", "Mon", "Tue", "Wed", "Thu", "Fri", "Sat"};
chart1.updateX(XAxis, 7);
```
The following overloads are available:
```cpp
void updateX(int arr_x[], size_t x_size);
void updateX(float arr_x[], size_t x_size);
void updateX(String arr_x[], size_t x_size);
void updateX(const char* arr_x[], size_t x_size);
```
### updateY()
Sets the Y-axis data (values) of the chart.
```cpp
int YAxis[] = {0, 0, 0, 0, 0, 0, 0};
chart1.updateY(YAxis, 7);
```
The following overloads are available:
```cpp
void updateY(int arr_y[], size_t y_size);
void updateY(float arr_y[], size_t y_size);
```
## Example
The X-axis labels usually change rarely, so set them once in `setup()`. Update the Y-axis values whenever new data is available, then call `dashboard.sendUpdates()`.
```cpp title="main.cpp"
// ...
AsyncWebServer server(80);
ESPDash dashboard(&server);
/* Axis data in global scope */
String XAxis[] = {"Sun", "Mon", "Tue", "Wed", "Thu", "Fri", "Sat"};
int YAxis[] = {0, 0, 0, 0, 0, 0, 0};
Chart power(&dashboard, BAR_CHART, "Power Usage (kWh)");
void setup() {
// ...
/* Set the X-axis once */
power.updateX(XAxis, 7);
server.begin();
}
void loop() {
/* Example data */
for (int i = 0; i < 7; i++) {
YAxis[i] = (int)random(0, 200);
}
power.updateY(YAxis, 7);
dashboard.sendUpdates();
delay(3000);
}
```
# Line Chart (/docs/espdash/v4/charts/line)
> Create a line chart in ESP-DASH v4 and update its X-axis and Y-axis data with updateX() and updateY().
Library: ESP-DASH v4.x.x
Availability: ESP-DASH Pro only
A line chart connects a series of values with a line, which makes it suited to showing trends over time, such as sensor readings.
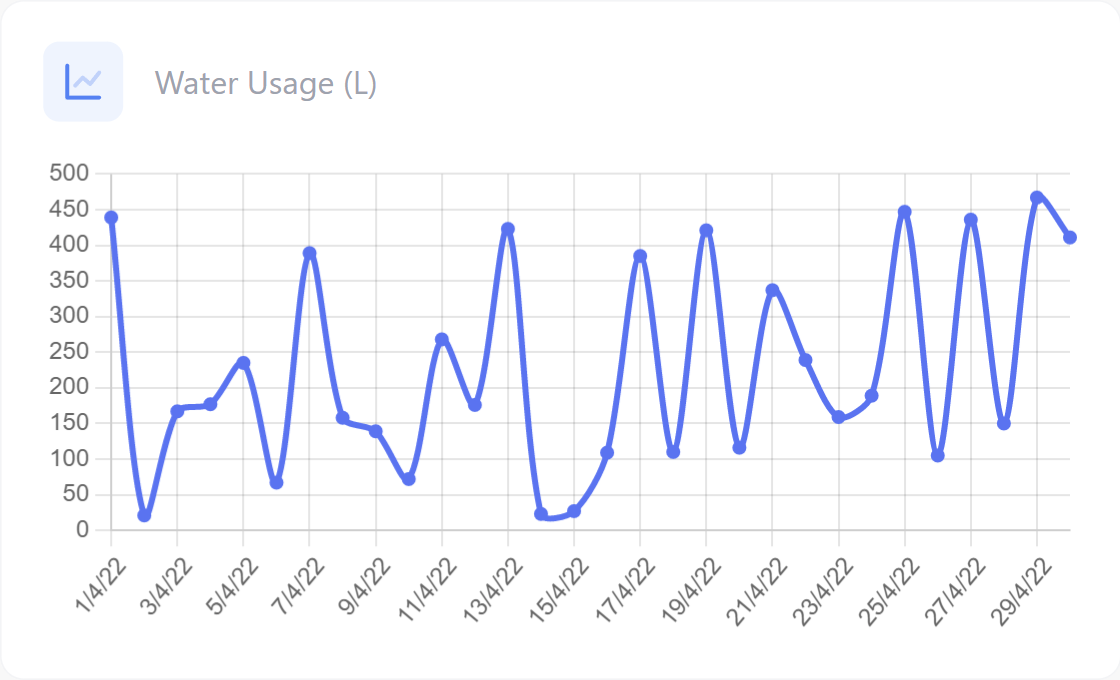
## Constructor
```cpp
Chart chart1(&dashboard, LINE_CHART, "Chart Name");
```
## Methods
Declare the axis arrays in global scope, or otherwise keep them in memory for the lifetime of the chart. The chart references the arrays you pass to `updateX()` and `updateY()`; they must not be freed or go out of scope.
### updateX()
Sets the X-axis data (labels) of the chart.
```cpp
String XAxis[] = {"Sun", "Mon", "Tue", "Wed", "Thu", "Fri", "Sat"};
chart1.updateX(XAxis, 7);
```
The following overloads are available:
```cpp
void updateX(int arr_x[], size_t x_size);
void updateX(float arr_x[], size_t x_size);
void updateX(String arr_x[], size_t x_size);
void updateX(const char* arr_x[], size_t x_size);
```
### updateY()
Sets the Y-axis data (values) of the chart.
```cpp
int YAxis[] = {0, 0, 0, 0, 0, 0, 0};
chart1.updateY(YAxis, 7);
```
The following overloads are available:
```cpp
void updateY(int arr_y[], size_t y_size);
void updateY(float arr_y[], size_t y_size);
```
## Example
The X-axis labels usually change rarely, so set them once in `setup()`. Update the Y-axis values whenever new data is available, then call `dashboard.sendUpdates()`.
```cpp title="main.cpp"
// ...
AsyncWebServer server(80);
ESPDash dashboard(&server);
/* Axis data in global scope */
String XAxis[] = {"Sun", "Mon", "Tue", "Wed", "Thu", "Fri", "Sat"};
int YAxis[] = {0, 0, 0, 0, 0, 0, 0};
Chart temperatureChart(&dashboard, LINE_CHART, "Temperature");
void setup() {
// ...
/* Set the X-axis once */
temperatureChart.updateX(XAxis, 7);
server.begin();
}
void loop() {
/* Example data */
for (int i = 0; i < 7; i++) {
YAxis[i] = (int)random(0, 50);
}
temperatureChart.updateY(YAxis, 7);
dashboard.sendUpdates();
delay(3000);
}
```
# Pie Chart (/docs/espdash/v4/charts/pie)
> Create a pie chart in ESP-DASH v4 and update its X-axis and Y-axis data with updateX() and updateY().
Library: ESP-DASH v4.x.x
Availability: ESP-DASH Pro only
A pie chart shows the proportion of each category in a whole. The X-axis data provides the category labels and the Y-axis data provides the value of each slice.
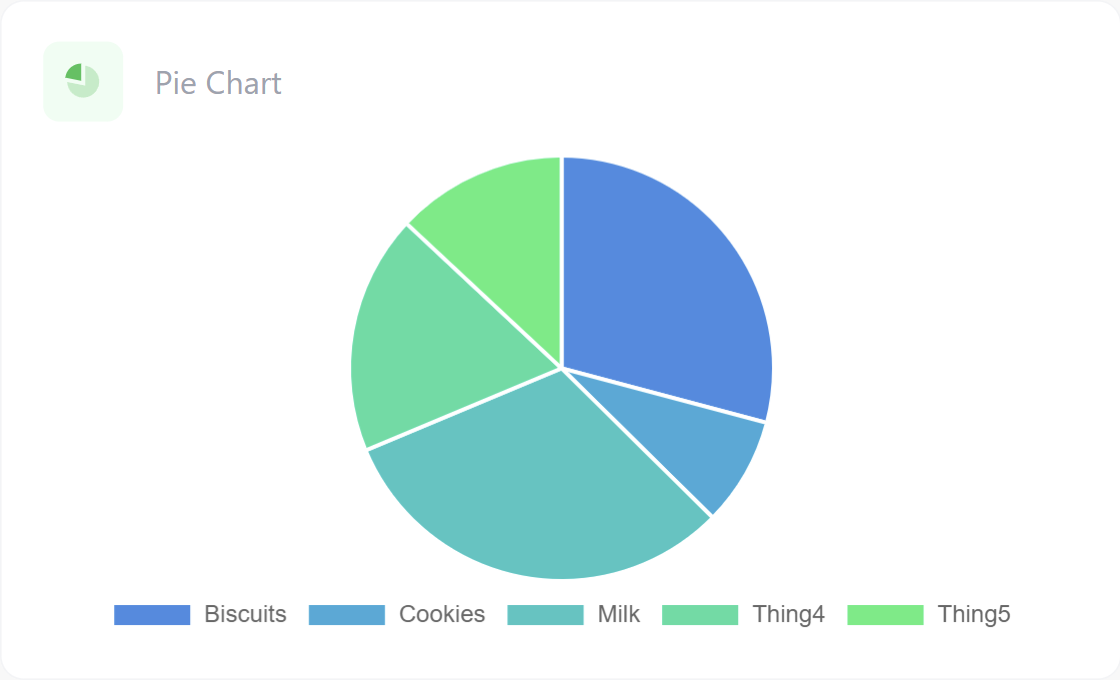
## Constructor
```cpp
Chart chart1(&dashboard, PIE_CHART, "Chart Name");
```
## Methods
Declare the axis arrays in global scope, or otherwise keep them in memory for the lifetime of the chart. The chart references the arrays you pass to `updateX()` and `updateY()`; they must not be freed or go out of scope.
### updateX()
Sets the X-axis data (labels) of the chart.
```cpp
String XAxis[] = {"Biscuits", "Cookies", "Milk", "Thing4", "Thing5"};
chart1.updateX(XAxis, 5);
```
The following overloads are available:
```cpp
void updateX(int arr_x[], size_t x_size);
void updateX(float arr_x[], size_t x_size);
void updateX(String arr_x[], size_t x_size);
void updateX(const char* arr_x[], size_t x_size);
```
### updateY()
Sets the Y-axis data (values) of the chart.
```cpp
int YAxis[] = {0, 0, 0, 0, 0};
chart1.updateY(YAxis, 5);
```
The following overloads are available:
```cpp
void updateY(int arr_y[], size_t y_size);
void updateY(float arr_y[], size_t y_size);
```
## Example
The X-axis labels usually change rarely, so set them once in `setup()`. Update the Y-axis values whenever new data is available, then call `dashboard.sendUpdates()`.
```cpp title="main.cpp"
// ...
AsyncWebServer server(80);
ESPDash dashboard(&server);
/* Axis data in global scope */
String XAxis[] = {"Biscuits", "Cookies", "Milk", "Thing4", "Thing5"};
int YAxis[] = {0, 0, 0, 0, 0};
Chart inventoryChart(&dashboard, PIE_CHART, "Inventory");
void setup() {
// ...
/* Set the X-axis once */
inventoryChart.updateX(XAxis, 5);
server.begin();
}
void loop() {
/* Example data */
for (int i = 0; i < 5; i++) {
YAxis[i] = (int)random(0, 100);
}
inventoryChart.updateY(YAxis, 5);
dashboard.sendUpdates();
delay(3000);
}
```
# Commercial License (/docs/espdash/v4/commercial-license)
> Compare the licensing and support terms of ESP-DASH Lite (GPL-3.0) and ESP-DASH Pro (commercial).
Library: ESP-DASH v4.x.x
ESP-DASH is available in two editions: ESP-DASH Lite, which is open source and licensed under GPL-3.0, and ESP-DASH Pro, which is distributed under a commercial license. Both editions are built on the same real-time dashboard library; they differ in features, licensing terms and support.
## Licensing
| | ESP-DASH Lite | ESP-DASH Pro |
| --- | --- | --- |
| License | GPL-3.0 | Commercial, one-time fee |
| Use, modify and distribute | Yes, under the terms of GPL-3.0 | Yes, under the terms of the commercial license |
| Commercial products | Permitted, but GPL-3.0 requires you to release the source code of your product, including any modifications to ESP-DASH Lite | Permitted without releasing your proprietary source code |
## Support
- **ESP-DASH Lite**: support is community-driven, through online forums, the documentation and user-contributed resources. Professional support is limited.
- **ESP-DASH Pro**: includes dedicated support, for teams that require timely and reliable assistance.
## Choose an edition
- Choose **ESP-DASH Lite** if your project is open source, or if the requirements of GPL-3.0 are acceptable for your use case and you need the core dashboard functionality.
- Choose **ESP-DASH Pro** if you are developing a commercial product and need to keep your source code proprietary, or if you need the additional widgets and features and professional support.
ESP-DASH Pro is available from the official product page at [store.softt.io](https://store.softt.io/products/esp-dash-pro).
# Brotli Compression (/docs/espdash/v4/features/brotli-compression)
> Enable Brotli compression for the ESP-DASH Pro v4 dashboard webpage to reduce flash usage, and review its browser and HTTPS requirements.
Library: ESP-DASH v4.x.x
Availability: ESP-DASH Pro only
Starting with ESP-DASH Pro v4.3.0, you can compress the dashboard webpage with Brotli instead of gzip. Brotli reduces the size of the webpage by about 40% compared to gzip, the default, which frees flash space for your application.

Over unencrypted HTTP, only Safari accepts Brotli-compressed responses. Other browsers, such as Chrome, Edge and Firefox, accept Brotli only over HTTPS. Enable Brotli only if your deployment meets these requirements.
Brotli compression is disabled by default.
## Enable Brotli compression
### Open dash_webpage.h
Open `dash_webpage.h` in the `src` directory of the ESP-DASH Pro library.
### Set the option
Locate `DASH_USE_BROTLI_COMPRESSION` and set it to `1`:
```cpp
#define DASH_USE_BROTLI_COMPRESSION 1
```
### Rebuild the firmware
Save the file, then compile and upload your sketch.
# Custom Title (/docs/espdash/v4/features/custom-title)
> Change the ESP-DASH Pro v4 dashboard title shown in the browser tab with setTitle().
Library: ESP-DASH v4.x.x
Availability: ESP-DASH Pro only
`setTitle()` on the `ESPDash` instance replaces the default title of the dashboard, which is shown in the browser tab.
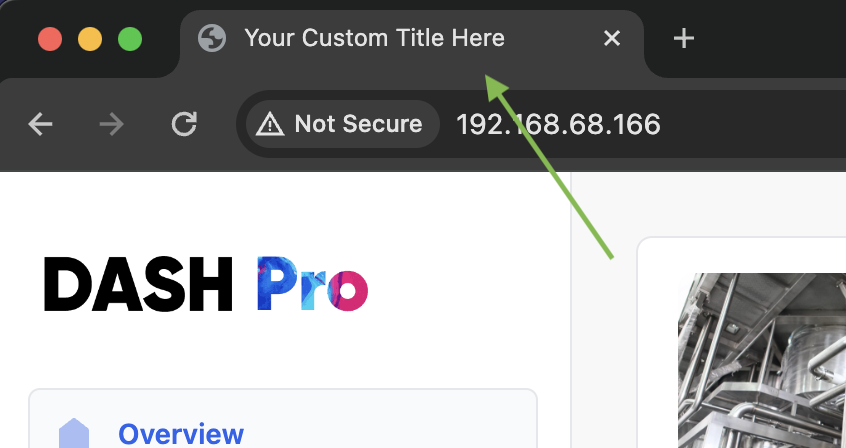
## Usage
```cpp
dashboard.setTitle("New Dashboard XYZ");
```
# Custom URI (/docs/espdash/v4/features/custom-uri)
> Serve the ESP-DASH v4 dashboard at a custom path instead of the root of the web server.
Library: ESP-DASH v4.x.x
By default, ESP-DASH serves the dashboard at the root path of the web server (`http:///`). To serve it at a different path, pass the URI as the second argument of the `ESPDash` constructor.
## Usage
```cpp
ESPDash dashboard(&server, "/dash");
```
The dashboard is then available at `http:///dash`.
## Constructor
```cpp
ESPDash(AsyncWebServer* server, const char* uri, bool enable_default_stats = true);
```
To disable the built-in system statistics while using a custom URI, see [Disable Statistics](/docs/espdash/v4/security/disable-statistics).
# Toggle Chart Animations (/docs/espdash/v4/features/toggle-chart-animations)
> Enable or disable chart animations in ESP-DASH Pro v4 with setChartAnimations(), useful for high-frequency chart updates.
Library: ESP-DASH v4.x.x
Availability: ESP-DASH Pro only
`setChartAnimations()` on the `ESPDash` instance enables or disables chart animations for the dashboard. Disabling animations is useful when you update charts at a high rate.
Chart animations are enabled by default.
## Usage
Call `setChartAnimations()` in `setup()`.
### Enable animations
```cpp
dashboard.setChartAnimations(true);
```
### Disable animations
```cpp
dashboard.setChartAnimations(false);
```
# Toggle Display (/docs/espdash/v4/features/toggle-display)
> Show or hide ESP-DASH Pro v4 cards, charts, tabs and statistics at runtime with setDisplay().
Library: ESP-DASH v4.x.x
Availability: ESP-DASH Pro only
`setDisplay()` shows or hides a widget on the dashboard. It is available on cards, charts, tabs and statistics, and lets you adapt the visible layout to the state of your application.
All widgets are displayed by default.
## Usage
Call `setDisplay()` on the widget, for example in `setup()`.
### Hide a widget
```cpp
card1.setDisplay(false); // Hide a card
chart1.setDisplay(false); // Hide a chart
tab1.setDisplay(false); // Hide a tab
stat1.setDisplay(false); // Hide a statistic
```
### Show a widget
```cpp
card1.setDisplay(true); // Show a card
chart1.setDisplay(true); // Show a chart
tab1.setDisplay(true); // Show a tab
stat1.setDisplay(true); // Show a statistic
```
# Widget Index (/docs/espdash/v4/features/widget-index)
> Control the position of ESP-DASH Pro v4 cards and charts on the dashboard with setIndex().
Library: ESP-DASH v4.x.x
Availability: ESP-DASH Pro only
`setIndex()` sets the position of a card or chart on the dashboard, so you can arrange the layout independently of the order in which widgets are declared.
## Usage
```cpp
card1.setIndex(0); // Set the card index
chart1.setIndex(1); // Set the chart index
```
Widgets are sorted in ascending order of their index: the widget with the lowest index is placed first, and the widget with the highest index is placed last.
# Widget Size (/docs/espdash/v4/features/widget-size)
> Set the responsive width of ESP-DASH Pro v4 cards and charts per screen breakpoint with setSize().
Library: ESP-DASH v4.x.x
Availability: ESP-DASH Pro only
`setSize()` sets the responsive width of a card or chart. You define a width for each screen breakpoint, and the dashboard layout adapts to the screen size without changes to the webpage.
## Breakpoints
Each breakpoint accepts a value from `1` to `12`.
## Methods
`setSize()` has two overloads, declared in `Card.h` of ESP-DASH Pro.
### setSize(xs, sm, md, lg, xl, xxl)
Pass each breakpoint as a separate argument:
```cpp
void setSize(const uint8_t xs, const uint8_t sm, const uint8_t md, const uint8_t lg, const uint8_t xl, const uint8_t xxl);
```
```cpp
card1.setSize(12, 12, 6, 4, 3, 2);
```
### setSize(const CardSize &size)
Pass a `CardSize` structure:
```cpp
struct CardSize {
uint8_t xs;
uint8_t sm;
uint8_t md;
uint8_t lg;
uint8_t xl;
uint8_t xxl;
};
void setSize(const CardSize &size);
```
```cpp
card1.setSize({
.xs = 12,
.sm = 12,
.md = 6,
.lg = 4,
.xl = 3,
.xxl = 2
});
```
# Examples (/docs/espdash/v4/getting-started/examples)
> Example sketches for ESP-DASH v4 that demonstrate cards, charts, interactive widgets and dynamic dashboards.
Library: ESP-DASH v4.x.x
The ESP-DASH repository includes documented example sketches that demonstrate common use cases. Each example is self-contained and can be uploaded after setting your Wi-Fi credentials.
## Available examples
The following examples ship with ESP-DASH Lite v4.0.9:
| Example | Description |
| --- | --- |
| `Basic` | Creates temperature and humidity cards and updates them at a fixed interval. |
| `AccessPoint` | Starts the board in Access Point (SoftAP) mode and serves the dashboard at `192.168.4.1`. |
| `Chart` | Creates a bar chart and updates its Y-axis values at a regular interval. |
| `Interactive` | Creates a button card and a slider card that respond to user input. |
| `Dynamic` | Creates cards on the heap and removes one from the dashboard at runtime. |
| `Benchmark` | Exercises the library to verify that ESP-DASH works correctly on your platform. |
You can find the examples in the [`examples` folder of the v4.0.9 release](https://github.com/ayushsharma82/ESP-DASH/tree/v4.0.9/examples). In the Arduino IDE, they are also available under **File > Examples > ESP-DASH** after installation.
The `master` branch of the repository contains the ESP-DASH v5 examples, which use a different API. Use the v4.0.9 tag for v4 sketches.
# Installation (/docs/espdash/v4/getting-started/installation)
> Install ESP-DASH v4 and its platform-specific dependencies in the Arduino IDE or PlatformIO.
Library: ESP-DASH v4.x.x
This page lists the dependencies ESP-DASH v4 requires on each platform and describes how to install the library in the Arduino IDE and PlatformIO.
## Dependencies
ESP-DASH requires the following libraries in your libraries folder. Install only the versions listed below; other versions can cause ESP-DASH to fail to compile or to work only partially.
As of v4.0.9, ESP-DASH depends on `ESP32Async/ESPAsyncWebServer`, which is the only officially maintained version of the library. Remove older forks and install the latest release from the ESP32Async organization.
The ESP32Async organization was formed by several core collaborators to maintain a single active version. All changes and improvements from mathieucarbou's fork of ESPAsyncWebServer have been merged into `ESP32Async/ESPAsyncWebServer`.
Install the dependencies for your platform:
- [ESP8266 Arduino Core](https://github.com/esp8266/Arduino) >= **v3.1.2**
- (ESP32Async) [ESPAsyncTCP](https://github.com/ESP32Async/ESPAsyncTCP#v2.0.0) @ **v2.0.0**
- (ESP32Async) [ESPAsyncWebServer](https://github.com/ESP32Async/ESPAsyncWebServer#v3.7.1) >= **v3.7.1**
- [ArduinoJson](https://github.com/bblanchon/ArduinoJson#v7.3.0) >= **v7.3.0**
- [ESP32 Arduino Core](https://github.com/espressif/arduino-esp32) >= **v3.1.3**
- (ESP32Async) [AsyncTCP](https://github.com/ESP32Async/AsyncTCP#v3.3.5) >= **v3.3.5**
- (ESP32Async) [ESPAsyncWebServer](https://github.com/ESP32Async/ESPAsyncWebServer#v3.7.1) >= **v3.7.1**
- [ArduinoJson](https://github.com/bblanchon/ArduinoJson#v7.3.0) >= **v7.3.0**
- [Pico Arduino Core](https://github.com/earlephilhower/arduino-pico) @ **v4.4.3**
- (ayushsharma82) [RPAsyncTCP](https://github.com/ayushsharma82/RPAsyncTCP#v1.3.0) >= **v1.3.0**
- (ESP32Async) [ESPAsyncWebServer](https://github.com/ESP32Async/ESPAsyncWebServer#v3.7.1) >= **v3.7.1**
- [ArduinoJson](https://github.com/bblanchon/ArduinoJson#v7.3.0) >= **v7.3.0**
- [Pico Arduino Core](https://github.com/earlephilhower/arduino-pico) @ **v4.4.3**
- (ayushsharma82) [RPAsyncTCP](https://github.com/ayushsharma82/RPAsyncTCP#v1.3.0) >= **v1.3.0**
- (ESP32Async) [ESPAsyncWebServer](https://github.com/ESP32Async/ESPAsyncWebServer#v3.7.1) >= **v3.7.1**
- [ArduinoJson](https://github.com/bblanchon/ArduinoJson#v7.3.0) >= **v7.3.0**
RP2040 refers to the Raspberry Pi Pico W and RP2350 to the Raspberry Pi Pico 2 W. RP2350 support was added in ESP-DASH v4.0.9.
## Install ESP-DASH
The latest ESP-DASH release is v5. When installing ESP-DASH v4, select a 4.x version (the final v4 release is v4.0.9) rather than the latest version.
### Library Manager [#library-manager]
Open **Sketch > Include Library > Manage Libraries**, search for "ESP-DASH", select a 4.x version and click **Install**.
### Manual installation [#manual-installation]
1. Download the [ESP-DASH v4.0.9 archive](https://github.com/ayushsharma82/ESP-DASH/archive/refs/tags/v4.0.9.zip).
2. Extract the archive into your Arduino libraries folder:
- Windows: `Documents/Arduino/libraries/`
- Linux: `/libraries/`
### Import a ZIP library [#import-a-zip-library]
1. Download the [ESP-DASH v4.0.9 archive](https://github.com/ayushsharma82/ESP-DASH/archive/refs/tags/v4.0.9.zip).
2. Open **Sketch > Include Library > Add .ZIP Library** and select the downloaded file.
ESP-DASH supports multiple architectures (ESP8266, ESP32 and RP2040). Without strict compatibility checks, PlatformIO tries to install the dependencies of every platform, which often causes compilation errors. Before installing ESP-DASH:
1. Delete the `.pio/libdeps` folder of your project, if it exists.
2. Add the following line to the environment in your `platformio.ini` file:
```ini
lib_compat_mode = strict
```
3. Save `platformio.ini`.
### Library Manager [#library-manager-1]
Open the PlatformIO menu, go to **Libraries**, search for "ESP-DASH" and add a 4.x version to your project. Alternatively, pin the version in `platformio.ini`:
```ini title="platformio.ini"
lib_deps =
ayushsharma82/ESP-DASH@^4.0.9
```
### Manual installation [#manual-installation-1]
1. Download the [ESP-DASH v4.0.9 archive](https://github.com/ayushsharma82/ESP-DASH/archive/refs/tags/v4.0.9.zip).
2. Extract the archive into the `lib` folder of your project.
## Next steps
- [Integration](/docs/espdash/v4/getting-started/integration): add a dashboard to an existing web server sketch.
- [Examples](/docs/espdash/v4/getting-started/examples): browse the example sketches.
# Integration (/docs/espdash/v4/getting-started/integration)
> Add an ESP-DASH v4 dashboard to an existing ESPAsyncWebServer sketch on ESP8266, ESP32 or RP2040.
Library: ESP-DASH v4.x.x
This guide shows how to add ESP-DASH to a sketch that already runs an `AsyncWebServer`. Each step adds a few lines to your existing code; the complete sketch is shown at the end.
### Include dependencies
The includes use conditional compilation so the same sketch builds for ESP8266, ESP32, RP2040 and RP2350.
```cpp
#include
#if defined(ESP8266)
/* ESP8266 dependencies */
#include
#include
#include
#elif defined(ESP32)
/* ESP32 dependencies */
#include
#include
#include
#elif defined(TARGET_RP2040) || defined(PICO_RP2040) || defined(TARGET_RP2350) || defined(PICO_RP2350)
/* RP2040 or RP2350 dependencies */
#include
#include
#include
#endif
#include
```
### Create the AsyncWebServer instance
Create an `AsyncWebServer` instance on port 80.
```cpp
AsyncWebServer server(80);
```
You are not limited to a single dashboard. You can host multiple dashboards on different ports.
### Attach ESP-DASH
Pass a pointer to the `AsyncWebServer` instance to the `ESPDash` constructor. ESP-DASH registers its routes and WebSocket handler on that server.
```cpp
ESPDash dashboard(&server);
```
You can continue to use the same `AsyncWebServer` instance for your own routes.
### Create widgets
Create widgets and pass a pointer to the dashboard as the first argument so that each widget can add itself to, and remove itself from, the dashboard.
```cpp
/*
Card format: (dashboard, card type, card name, symbol (optional))
*/
Card temperature(&dashboard, TEMPERATURE_CARD, "Temperature", "°C");
Card humidity(&dashboard, HUMIDITY_CARD, "Humidity", "%");
```
See the [Cards](/docs/espdash/v4/cards/generic) section for the available card types.
### Configure setup()
Connect to Wi-Fi and start the server with `server.begin()`.
```cpp
void setup() {
Serial.begin(115200);
/* Connect to Wi-Fi */
WiFi.mode(WIFI_STA);
WiFi.begin(ssid, password);
if (WiFi.waitForConnectResult() != WL_CONNECTED) {
Serial.printf("WiFi Failed!\n");
return;
}
Serial.print("IP Address: ");
Serial.println(WiFi.localIP());
/* Start AsyncWebServer */
server.begin();
}
```
### Update widgets in loop()
Update the card values, then call `dashboard.sendUpdates()` to push the changes to all connected clients. You can call these methods anywhere in your sketch; the example uses `loop()` for simplicity.
```cpp
void loop() {
/* Update card values */
temperature.update((int)random(0, 50));
humidity.update((int)random(0, 100));
/* Send updates to the dashboard */
dashboard.sendUpdates();
/* For demonstration only; use a millis() interval in production code */
delay(3000);
}
```
### Upload the sketch
Set `ssid` and `password` to match your access point, upload the sketch and open the IP address printed on the serial monitor in a browser.
```cpp title="main.cpp"
#include
#if defined(ESP8266)
/* ESP8266 dependencies */
#include
#include
#include
#elif defined(ESP32)
/* ESP32 dependencies */
#include
#include
#include
#elif defined(TARGET_RP2040) || defined(PICO_RP2040) || defined(TARGET_RP2350) || defined(PICO_RP2350)
/* RP2040 or RP2350 dependencies */
#include
#include
#include
#endif
#include
/* Wi-Fi credentials */
const char* ssid = "";
const char* password = "";
AsyncWebServer server(80);
ESPDash dashboard(&server);
/*
Card format: (dashboard, card type, card name, symbol (optional))
*/
Card temperature(&dashboard, TEMPERATURE_CARD, "Temperature", "°C");
Card humidity(&dashboard, HUMIDITY_CARD, "Humidity", "%");
void setup() {
Serial.begin(115200);
/* Connect to Wi-Fi */
WiFi.mode(WIFI_STA);
WiFi.begin(ssid, password);
if (WiFi.waitForConnectResult() != WL_CONNECTED) {
Serial.printf("WiFi Failed!\n");
return;
}
Serial.print("IP Address: ");
Serial.println(WiFi.localIP());
/* Start AsyncWebServer */
server.begin();
}
void loop() {
/* Update card values */
temperature.update((int)random(0, 50));
humidity.update((int)random(0, 100));
/* Send updates to the dashboard */
dashboard.sendUpdates();
/* For demonstration only; use a millis() interval in production code */
delay(3000);
}
```
## Next steps
- [Cards](/docs/espdash/v4/cards/generic): the card types and their parameters.
- [Charts](/docs/espdash/v4/charts/bar): plot data series on the dashboard.
- [Authentication](/docs/espdash/v4/security/authentication): restrict access to the dashboard.
# Introduction (/docs/espdash/v4)
> Documentation for ESP-DASH v4 (legacy), a library for building real-time web dashboards on ESP8266, ESP32 and RP2040 microcontrollers.
Library: ESP-DASH v4.x.x
This is the documentation for ESP-DASH v4, a legacy release. New projects should use ESP-DASH v5. To upgrade an existing project, see [Migrating from v4 to v5](/docs/espdash/v5/getting-started/migrating-from-v4-to-v5).
ESP-DASH is a C++ library that serves a real-time dashboard directly from your microcontroller. You declare cards, charts and statistics in your sketch, and ESP-DASH generates the web interface and keeps every connected client synchronized over WebSockets. No HTML, CSS or JavaScript is required.
GitHub repository: https://github.com/ayushsharma82/ESP-DASH

## Capabilities
- Automatic generation of the dashboard webpage, served from flash.
- Real-time updates pushed to all connected clients.
- A C++ interface for every widget; no front-end code is required.
- Ready-to-use cards for common data types, such as temperature, humidity, status, sliders and buttons.
- Dynamic layouts: widgets can be added or removed at runtime.
- Built-in charts and a statistics page with system and custom key-value metrics.
## Supported boards
ESP-DASH v4 supports the following microcontrollers:
- **ESP8266**
- **ESP32**
- **RP2040** (Raspberry Pi Pico W)
See [Installation](/docs/espdash/v4/getting-started/installation) for the required core and library versions for each platform.
## ESP-DASH Lite and ESP-DASH Pro
This documentation covers both editions of ESP-DASH v4. ESP-DASH Lite is open source and licensed under GPL-3.0. ESP-DASH Pro is a commercial edition with additional cards, charts, tabs, branding and layout features. Pages and features that are available only in ESP-DASH Pro are marked accordingly. See [Commercial License](/docs/espdash/v4/commercial-license) for a comparison, or visit [store.softt.io](https://store.softt.io/products/esp-dash-pro).
## Explore the documentation
# Authentication (/docs/espdash/v4/security/authentication)
> Protect an ESP-DASH v4 dashboard with HTTP Basic Authentication using setAuthentication().
Library: ESP-DASH v4.x.x
ESP-DASH supports HTTP Basic Authentication. When enabled, the browser prompts for a username and password before the dashboard loads.
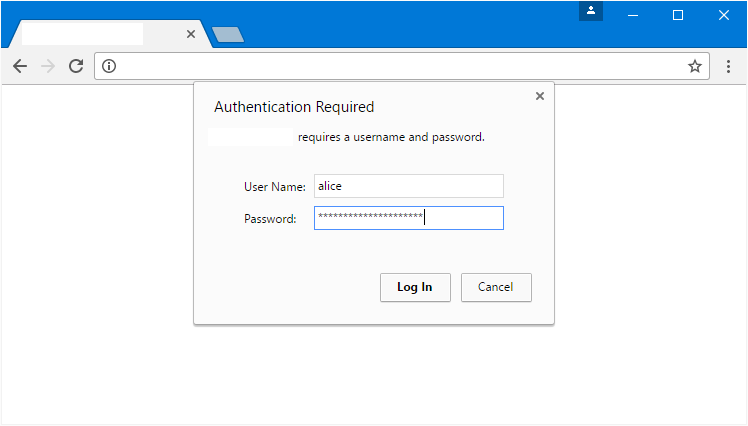
## Enable authentication
Call `setAuthentication()` on the dashboard instance, typically in `setup()`:
```cpp
dashboard.setAuthentication("username", "password");
```
`setAuthentication()` accepts the credentials either as `const char*` or as `String`:
```cpp
void setAuthentication(const char* user, const char* pass);
void setAuthentication(const String &user, const String &pass);
```
HTTP Basic Authentication transmits credentials encoded, not encrypted. Over plain HTTP, anyone on the same network can read them. Use it as an access control on trusted networks.
# Disable Statistics (/docs/espdash/v4/security/disable-statistics)
> Disable the built-in system statistics in ESP-DASH v4 and hide the Statistics tab from the sidebar.
Library: ESP-DASH v4.x.x
ESP-DASH displays system statistics, such as the hardware platform, SDK version and free heap, on the [Statistics](/docs/espdash/v4/statistics) page by default. To disable them, pass `false` as the last argument of the `ESPDash` constructor.
## Disable system statistics
If you serve the dashboard at the default URI, pass `false` as the second argument:
```cpp
ESPDash dashboard(&server, false);
```
If you use a [custom URI](/docs/espdash/v4/features/custom-uri), pass `false` as the third argument:
```cpp
ESPDash dashboard(&server, "/", false);
```
## Hide the Statistics tab
When system statistics are disabled and the sketch defines no custom statistics, the dashboard hides the Statistics tab from the sidebar automatically.
# Statistics (/docs/espdash/v4/statistics)
> Display built-in system metrics and custom key-value statistics on the ESP-DASH v4 Statistics page.
Library: ESP-DASH v4.x.x
The dashboard includes a dedicated Statistics page that lists key-value pairs. By default, it shows system statistics such as the hardware platform, SDK version, free heap and Wi-Fi signal strength. Since ESP-DASH v4, you can also add your own statistics to this page with the `Statistic` class.
System statistics can be turned off at any time. See [Disable Statistics](/docs/espdash/v4/security/disable-statistics).
## Constructor
Declare statistics in global scope, outside of any function.
```cpp
Statistic stat1(&dashboard, "Key", "Value");
```
ESP-DASH Lite stores the `key` pointer without copying it, so pass a string literal or a buffer that remains valid for the lifetime of the statistic. The value is copied.
## Methods
### set(value)
Updates the value of the statistic.
```cpp
stat1.set("New Value");
```
### set(key, value)
Updates both the key and the value of the statistic.
```cpp
stat1.set("New Key", "New Value");
```
ESP-DASH Lite v4.0.9 provides only `set(const char* value)`. The two-argument overload that also changes the key is not available in ESP-DASH Lite.
## Example
```cpp title="main.cpp"
// ...
AsyncWebServer server(80);
ESPDash dashboard(&server);
Statistic uptime(&dashboard, "Uptime (s)", "0");
void setup() {
// ...
server.begin();
}
void loop() {
uptime.set(String(millis() / 1000).c_str());
dashboard.sendUpdates();
delay(3000);
}
```
# Tabs (/docs/espdash/v4/tabs)
> Organize ESP-DASH Pro v4 widgets into multiple dashboard pages with the Tab class and setTab().
Library: ESP-DASH v4.x.x
Availability: ESP-DASH Pro only
Tabs split the dashboard into multiple pages so you can group related cards and charts. They are useful for dashboards with a large number of widgets.
By default, ESP-DASH places every widget in the **Overview** tab.
If every card and chart is assigned to a custom tab, the dashboard hides the Overview tab from the sidebar automatically.
## Constructor
Declare tabs in global scope, outside of any function.
```cpp
Tab tab1(&dashboard, "Custom Tab 1");
```
## Assign widgets to a tab
Call `setTab()` on a card or chart and pass a pointer to the tab:
```cpp
card1.setTab(&tab1);
chart1.setTab(&tab1);
```
## Example
```cpp title="main.cpp"
// ...
AsyncWebServer server(80);
ESPDash dashboard(&server);
Tab sensorsTab(&dashboard, "Sensors");
Card temperature(&dashboard, TEMPERATURE_CARD, "Temperature", "°C");
Card humidity(&dashboard, HUMIDITY_CARD, "Humidity", "%");
void setup() {
// ...
temperature.setTab(&sensorsTab);
humidity.setTab(&sensorsTab);
server.begin();
}
void loop() {
temperature.update((int)random(0, 50));
humidity.update((int)random(0, 100));
dashboard.sendUpdates();
delay(3000);
}
```
# AI Tools (/docs/espdash/v5/ai-tools)
> Use the ESP-DASH documentation from AI coding assistants through the MCP server, llms.txt and Markdown page exports.
Library: ESP-DASH v5.x.x
The ESP-DASH documentation is available in machine-readable formats so that AI coding assistants can answer questions and generate code from the current API instead of outdated training data.
## Ask AI
Select **Ask AI** at the bottom of any documentation page to open the documentation assistant. It searches these pages before answering and links to the sources it used. Answers are grounded in the documentation only; verify generated code against the referenced pages.
## MCP server
The documentation is served as a [Model Context Protocol](https://modelcontextprotocol.io) server over Streamable HTTP. No authentication is required. One server covers every SOFTT library (ESP-DASH, ElegantOTA, NetWizard and WebSerial); pass `library: "espdash"` to limit results to ESP-DASH.
```text
https://docs.softt.io/api/mcp
```
The server exposes three read-only tools:
| Tool | Description |
| --- | --- |
| `search_docs` | Full-text search across the documentation. Accepts `query`, an optional `library` (`espdash`, `elegantota`, `netwizard`, `webserial` or `all`), an optional `version` for ESP-DASH (`v5`, `v4` or `all`) and `limit`. |
| `get_page` | Returns the complete Markdown of a page, such as `/docs/espdash/v5/cards/slider`. |
| `list_pages` | Lists pages with their title, description and URL, filtered by `library` and `version`. |
### Connect a client
```bash
claude mcp add --transport http softt https://docs.softt.io/api/mcp
```
Add the server to `.cursor/mcp.json` in your project, or to `~/.cursor/mcp.json` for all projects:
```json title=".cursor/mcp.json"
{
"mcpServers": {
"softt": {
"url": "https://docs.softt.io/api/mcp"
}
}
}
```
Add the server to `.vscode/mcp.json` in your workspace:
```json title=".vscode/mcp.json"
{
"servers": {
"softt": {
"type": "http",
"url": "https://docs.softt.io/api/mcp"
}
}
}
```
Clients that support Streamable HTTP connect directly to the server URL. For clients that only support stdio, use the [`mcp-remote`](https://www.npmjs.com/package/mcp-remote) bridge:
```json
{
"softt": {
"command": "npx",
"args": ["-y", "mcp-remote", "https://docs.softt.io/api/mcp"]
}
}
```
Once connected, ask your assistant questions such as "Add an ESP-DASH slider card that controls LED brightness" and it will retrieve the relevant pages before writing code.
## llms.txt
The site publishes [llms.txt](https://llmstxt.org) files for tools that ingest documentation directly:
| URL | Contents |
| --- | --- |
| [`/llms.txt`](/llms.txt) | Index of every page with its title, description and link. |
| [`/llms-full.txt`](/llms-full.txt) | The complete documentation of every library and version as a single Markdown file. |
## Markdown pages
Every page is also available as Markdown:
- Append `.md` to a page URL, for example [`/docs/espdash/v5/cards/slider.md`](/docs/espdash/v5/cards/slider.md).
- Requests with an `Accept: text/markdown` header receive Markdown instead of HTML.
- Use **Copy Markdown** at the top of a page to copy it to the clipboard, or **Open** to send it to an assistant such as ChatGPT or Claude.
# Branding (/docs/espdash/v5/branding)
> Replace the default ESP-DASH Pro dashboard logo with your own light and dark logos by editing the logo.h and logo.cpp library files.
Library: ESP-DASH v5.x.x
Availability: ESP-DASH Pro only
Branding refers to the logo displayed on the ESP-DASH Pro dashboard. The logo is stored as byte arrays in the `logo.h` and `logo.cpp` files of the library source, so you can replace it without modifying any HTML or CSS.
## Replace the logo
### Prepare the logos
Create or obtain the logo you want to display. Use SVG (recommended), PNG or JPG, and optimize the image to keep the file size small.
Prepare two versions of the logo, one for each theme. The light-theme logo should use darker colors and the dark-theme logo lighter colors, so that the logo remains legible in both themes.
### Convert the logos
Convert both logo images into byte arrays. The converter below generates ready-to-use `logo.h` and `logo.cpp` files with gzip-compressed data:
(Interactive logo converter available at https://docs.softt.io/docs/espdash/v5/branding)
To convert the images manually instead, use the [File2Raw](https://ayushsharma82.github.io/file2raw/) utility, as described in the `logo.cpp` file of the ESP-DASH Pro library:
1. Open [File2Raw](https://ayushsharma82.github.io/file2raw/) and upload the image file.
2. Select **Gzip Compress** and **Use PROGMEM (Arduino)**.
3. Click **Convert** and copy the generated data.
Repeat the procedure for the light-theme and the dark-theme logo.
The conversion utility is provided as is, without warranty or liability of any kind.
### Replace the logo files in the ESP-DASH Pro library
If you used the converter, replace `logo.h` and `logo.cpp` in the `src` folder of the ESP-DASH Pro library with the downloaded files. If you converted the images manually, update the existing files:
1. In `logo.cpp`, replace the contents of `DASH_LOGO_LIGHT` and `DASH_LOGO_DARK` with the generated data.
2. In `logo.h`, update the array sizes in the `extern` declarations of `DASH_LOGO_LIGHT` and `DASH_LOGO_DARK` to match the new data.
3. In `logo.h`, set `DASH_LOGO_LIGHT_MIME` and `DASH_LOGO_DARK_MIME` to the MIME type of each image, for example `"image/svg+xml"` or `"image/png"`.
4. Keep `DASH_LOGO_GZIPPED` set to `1` when the data is gzip-compressed.
```cpp title="logo.h"
#define DASH_LOGO_LIGHT_MIME "image/svg+xml"
#define DASH_LOGO_DARK_MIME "image/svg+xml"
#define DASH_LOGO_GZIPPED 1
#define DASH_LOGO_WIDTH 158
#define DASH_LOGO_HEIGHT 32
extern const uint8_t DASH_LOGO_LIGHT[1983];
extern const uint8_t DASH_LOGO_DARK[1961];
```
### Upload the firmware
Compile the sketch with the modified ESP-DASH Pro library and upload the firmware to your device.
Browsers cache the logo. Clear the browser cache or perform a hard refresh to see the new logo immediately.
### Review the changes
Open the dashboard in a browser. The dashboard switches between the light and dark logos according to the active theme.
To adjust the logo size, change `DASH_LOGO_WIDTH` and `DASH_LOGO_HEIGHT` in `logo.h` and upload the firmware again. Clear the browser cache after each change.
Logos and other branding elements may be subject to copyright and trademark law. Ensure that you have the necessary rights or permissions to use any branding elements in your project.
# Action Button Card (/docs/espdash/v5/cards/action-button)
> A button that asks the user to confirm in a dialog before the device runs an action.
Library: ESP-DASH v5.x.x
Availability: ESP-DASH Pro only
The action button card opens a confirmation dialog when pressed and reports whether the user confirmed or cancelled. Use it for actions that should not run by accident, such as restarting the device or erasing stored data.
## Constructor
```cpp
dash::ActionButtonCard(ESPDash& dashboard, const char* name, const char* title, const char* description);
```
```cpp
dash::ActionButtonCard restartButton(
dashboard,
"Restart Device",
"Are you sure you want to restart the device?",
"This action will restart the device and any unsaved data will be lost."
);
```
An overload without the `dashboard` argument creates the card without attaching it to a dashboard; attach it later with `dashboard.add(card)`.
## Callback
```cpp
void onAction(std::function callback);
```
The callback fires when the user closes the confirmation dialog. `confirm` is `true` if the user confirmed the action and `false` if the user cancelled it. The card holds no value, so no dashboard update is required inside the callback.
```cpp
restartButton.onAction([](bool confirm) {
if (confirm) {
Serial.println("Action confirmed");
} else {
Serial.println("Action cancelled");
}
});
```
## Methods
### `setTitle()`
```cpp
void setTitle(dash::string title);
```
Changes the title of the confirmation dialog.
```cpp
restartButton.setTitle("Restart now?");
```
### `setDescription()`
```cpp
void setDescription(dash::string description);
```
Changes the message shown in the confirmation dialog.
```cpp
restartButton.setDescription("The device will be unavailable for a few seconds.");
```
## Example
```cpp title="main.cpp"
#include
#include
#include
#include
#include
AsyncWebServer server(80);
ESPDash dashboard(server);
dash::ActionButtonCard restartButton(
dashboard,
"Restart Device",
"Are you sure you want to restart the device?",
"This action will restart the device and any unsaved data will be lost."
);
uint32_t restartAt = 0;
void setup() {
Serial.begin(115200);
// ... connect to WiFi
restartButton.onAction([](bool confirm) {
if (confirm) {
// Defer the restart so the callback can return first
restartAt = millis() + 1000;
}
});
server.begin();
}
void loop() {
if (restartAt != 0 && millis() > restartAt) {
ESP.restart();
}
}
```
# Air Card (/docs/espdash/v5/cards/air)
> Display an atmospheric pressure reading with a configurable unit using dash::AirCard.
Library: ESP-DASH v5.x.x
Availability: ESP-DASH Pro only
The air card displays an atmospheric pressure reading with a unit, such as the output of a BMP280 or BME680 sensor.
## Constructor
```cpp
dash::AirCard card(dashboard, name, unit);
```
Template parameters:
```cpp
dash::AirCard pressure(dashboard, "Pressure"); // float, 2 decimals, hPa
dash::AirCard pressureKpa(dashboard, "Pressure", "kPa");
dash::AirCard pressurePa(dashboard, "Pressure", "Pa");
```
An overload without the `dashboard` argument creates the card without attaching it to a dashboard; attach it later with `dashboard.add(card)`.
## Methods
### `setValue()`
```cpp
bool setValue(T value);
```
Sets the pressure value. Returns `true` if the value changed and an update is pending.
### `value()`
```cpp
const T& value() const;
```
Returns the current value. Call it only when `hasValue()` returns `true`.
### `hasValue()`
```cpp
bool hasValue() const;
```
Returns `true` if a value has been set.
### `removeValue()`
```cpp
bool removeValue();
```
Clears the value. The dashboard then shows `0`. Returns `true` if a value was removed.
### `setUnit()`
```cpp
bool setUnit(const char* unit);
```
Sets the unit, for example `"hPa"` or `"kPa"`. Returns `true` if the unit changed.
### `unit()`
```cpp
const char* unit() const;
```
Returns the current unit.
## Example
```cpp title="main.cpp"
#include
#include // ESP32; use the networking headers for your board
#include
#include
#include
AsyncWebServer server(80);
ESPDash dashboard(server);
dash::AirCard pressure(dashboard, "Pressure", "hPa");
void setup() {
// ... connect to Wi-Fi
server.begin();
}
void loop() {
float reading = 1013.25f; // replace with a sensor reading
pressure.setValue(reading);
dashboard.sendUpdates();
delay(3000);
}
```
## Notes
- The card stores the `unit` pointer and does not copy the string. Pass a string literal or a buffer that outlives the card.
- Changing the unit does not convert the value; set a value in the new unit as well.
# Color Picker Card (/docs/espdash/v5/cards/color-picker)
> Let users pick a color in the browser and receive it on the device as a hex string.
Library: ESP-DASH v5.x.x
Availability: ESP-DASH Pro only
The color picker card opens the browser's native color picker and sends the selected color to the device as a hex string such as `#ff0000`. Use it to control RGB LEDs, light strips or any color setting.
## Constructor
```cpp
dash::ColorPickerCard(ESPDash& dashboard, const char* name);
```
The value type is always `dash::string`; the card takes no template parameters.
```cpp
dash::ColorPickerCard colorPicker(dashboard, "Color Picker");
```
An overload without the `dashboard` argument creates the card without attaching it to a dashboard; attach it later with `dashboard.add(card)`.
## Callback
```cpp
void onChange(std::function& value)> callback);
```
The callback fires when the user picks a color. Changes are debounced in the browser, so dragging across the picker produces one event after the user pauses for about 300 ms. `value` holds the color as a 7-character hex string (`#rrggbb`). Call `setOptionalValue()` (or `setValue()`) and `dashboard.sendUpdates()` inside the callback to store the color and keep the dashboard in sync.
```cpp
colorPicker.onChange([](const std::optional& value) {
Serial.printf("Color: %s\n", value.value_or("").c_str());
colorPicker.setOptionalValue(value);
dashboard.sendUpdates();
});
```
## Methods
### `setValue()`
```cpp
bool setValue(dash::string value);
```
Sets the current color. Use a hex string in the form `#rrggbb`. Returns `true` if the value changed.
```cpp
colorPicker.setValue("#ff0000");
```
### `setOptionalValue()`
```cpp
bool setOptionalValue(std::optional value);
```
Sets the color from an optional value, as received in the callback. An empty optional clears the value. Returns `true` if the value changed.
### `value()`
```cpp
const dash::string& value() const;
```
Returns the current color. Check `hasValue()` first if the color may not have been set yet.
## Example
```cpp title="main.cpp"
#include
#include
#include
#include
#include
AsyncWebServer server(80);
ESPDash dashboard(server);
dash::ColorPickerCard colorPicker(dashboard, "LED Color");
void setup() {
Serial.begin(115200);
// ... connect to WiFi
colorPicker.setValue("#2563eb");
colorPicker.onChange([](const std::optional& value) {
if (value.has_value()) {
// Convert "#rrggbb" to a 24-bit integer
uint32_t rgb = strtoul(value.value().c_str() + 1, nullptr, 16);
uint8_t r = (rgb >> 16) & 0xFF;
uint8_t g = (rgb >> 8) & 0xFF;
uint8_t b = rgb & 0xFF;
Serial.printf("R=%u G=%u B=%u\n", r, g, b);
}
colorPicker.setOptionalValue(value);
dashboard.sendUpdates();
});
server.begin();
}
void loop() {
// ...
}
```
# Dropdown Card (/docs/espdash/v5/cards/dropdown)
> Present a list of predefined options in a dropdown and receive the selected value on the device.
Library: ESP-DASH v5.x.x
Availability: ESP-DASH Pro only
The dropdown card presents a list of options defined as a comma-separated string and reports the selected option back to the device. Use it for mode selection, presets or any setting with a fixed set of values.
## Constructor
```cpp
template
dash::DropdownCard(ESPDash& dashboard, const char* name, const char* options = "");
```
### Template parameters
### Parameters
```cpp
// String values (default)
dash::DropdownCard dropdown(dashboard, "Mode", "Auto,Manual,Off");
// Float values with 3 decimal places
dash::DropdownCard dropdownFloat(dashboard, "Float Dropdown", "1.234,2.345,3.456");
// Integer values
dash::DropdownCard dropdownInt(dashboard, "Int Dropdown", "1,2,3,4");
```
An overload without the `dashboard` argument creates the card without attaching it to a dashboard; attach it later with `dashboard.add(card)`.
## Callback
```cpp
void onChange(std::function callback);
```
The callback fires when the user selects an option. `value` is the selected option converted to `T`. The card does not update its own value; call `setValue()` and `dashboard.sendUpdates()` inside the callback to confirm the selection on the dashboard.
```cpp
dropdown.onChange([](const dash::string& value) {
Serial.printf("Selected: %s\n", value.c_str());
dropdown.setValue(value);
dashboard.sendUpdates();
});
```
## Methods
### `setOptions()`
```cpp
bool setOptions(const char* options);
```
Replaces the list of options with a comma-separated string. Returns `true` if the options changed.
```cpp
dropdown.setOptions("Low,Medium,High");
```
### `options()`
```cpp
const char* options() const;
```
Returns the current comma-separated list of options.
### `setValue()`
```cpp
bool setValue(T value);
```
Sets the selected option. `value` must be of type `T` and should match one of the options. Returns `true` if the value changed.
```cpp
dropdown.setValue("Manual");
```
### `value()`
```cpp
const T& value() const;
```
Returns the currently selected value.
## Example
```cpp title="main.cpp"
#include
#include
#include
#include
#include
AsyncWebServer server(80);
ESPDash dashboard(server);
dash::DropdownCard dropdown(dashboard, "Mode", "Auto,Manual,Off");
void setup() {
Serial.begin(115200);
// ... connect to WiFi
dropdown.setValue("Auto");
dropdown.onChange([](const dash::string& value) {
Serial.printf("Mode: %s\n", value.c_str());
dropdown.setValue(value);
dashboard.sendUpdates();
});
server.begin();
}
void loop() {
// ...
}
```
## Notes
- The number of options is not limited. Options are split on commas without trimming, so do not add spaces around the separators unless they are part of the option text.
- The card stores the `options` pointer and does not copy the string. Pass a string literal or a buffer that remains valid for the lifetime of the card.
# Energy Card (/docs/espdash/v5/cards/energy)
> Display an energy or power consumption value with a configurable unit using dash::EnergyCard.
Library: ESP-DASH v5.x.x
Availability: ESP-DASH Pro only
The energy card displays an energy or power consumption value with a unit, such as readings from an energy meter or a current sensor.
## Constructor
```cpp
dash::EnergyCard card(dashboard, name, unit);
```
Template parameters:
```cpp
dash::EnergyCard energy(dashboard, "Energy consumption", "kWh"); // float, 2 decimals
dash::EnergyCard energyJ(dashboard, "Energy consumption", "J");
dash::EnergyCard energyWh(dashboard, "Energy consumption", "Wh");
```
An overload without the `dashboard` argument creates the card without attaching it to a dashboard; attach it later with `dashboard.add(card)`.
## Methods
### `setValue()`
```cpp
bool setValue(T value);
```
Sets the energy value. Returns `true` if the value changed and an update is pending.
### `value()`
```cpp
const T& value() const;
```
Returns the current value. Call it only when `hasValue()` returns `true`.
### `hasValue()`
```cpp
bool hasValue() const;
```
Returns `true` if a value has been set.
### `removeValue()`
```cpp
bool removeValue();
```
Clears the value. The dashboard then shows `0`. Returns `true` if a value was removed.
### `setUnit()`
```cpp
bool setUnit(const char* unit);
```
Sets the unit displayed next to the value. Returns `true` if the unit changed.
### `unit()`
```cpp
const char* unit() const;
```
Returns the current unit.
## Example
```cpp title="main.cpp"
#include
#include // ESP32; use the networking headers for your board
#include
#include
#include
AsyncWebServer server(80);
ESPDash dashboard(server);
dash::EnergyCard energy(dashboard, "Energy consumption", "kWh");
void setup() {
// ... connect to Wi-Fi
server.begin();
}
void loop() {
float consumption = 123.4f; // replace with a meter reading
energy.setValue(consumption);
dashboard.sendUpdates();
delay(3000);
}
```
## Notes
- The default unit is an empty string. Pass a unit to the constructor or call `setUnit()`.
- The card stores the `unit` pointer and does not copy the string. Pass a string literal or a buffer that outlives the card.
# Feedback Card (/docs/espdash/v5/cards/feedback)
> Display a status message with an info, success, warning or danger indicator using dash::FeedbackCard.
Library: ESP-DASH v5.x.x
The feedback card displays a text message together with a status indicator. Use it to report system state, the result of an operation, warnings or errors.
## Constructor
```cpp
dash::FeedbackCard card(dashboard, name, initialStatus, initialMessage);
```
Template parameters:
```cpp
dash::FeedbackCard feedback(dashboard, "Status");
dash::FeedbackCard network(dashboard, "Network", dash::Status::INFO, "Connecting");
```
An overload without the `dashboard` argument creates the card without attaching it to a dashboard; attach it later with `dashboard.add(card)`.
### Status values
| Value | Meaning |
| --- | --- |
| `dash::Status::NONE` | No status indicator (default). |
| `dash::Status::INFO` | Informational message. |
| `dash::Status::SUCCESS` | Operation completed successfully. |
| `dash::Status::WARNING` | Warning condition. |
| `dash::Status::DANGER` | Error or critical failure. |
## Methods
### `setFeedback()`
```cpp
bool setFeedback(const char* message, dash::Status status);
bool setFeedback(const dash::string& message, dash::Status status); // T = dash::string only
```
Sets the message and the status in one call. Returns `true` if either changed.
```cpp
feedback.setFeedback("Light is on", dash::Status::SUCCESS);
```
### `setMessage()`
```cpp
bool setMessage(const char* message);
bool setMessage(const dash::string& message); // T = dash::string only
```
Sets the message and keeps the current status. Returns `true` if the message changed.
### `setStatus()`
```cpp
bool setStatus(dash::Status status);
```
Sets the status and keeps the current message. Returns `true` if the status changed.
### `status()`
```cpp
dash::Status status() const;
```
Returns the current status.
### `value()`
```cpp
const T& value() const;
```
Returns the current message. Call it only when `hasValue()` returns `true`; the constructor always sets a message, so this holds unless you call `removeValue()`.
## Example
```cpp title="main.cpp"
#include
#include // ESP32; use the networking headers for your board
#include
#include
#include
AsyncWebServer server(80);
ESPDash dashboard(server);
dash::FeedbackCard feedback(dashboard, "Status");
void setup() {
// ... connect to Wi-Fi
server.begin();
feedback.setFeedback("System ready", dash::Status::SUCCESS);
dashboard.sendUpdates();
}
void loop() {
if (WiFi.RSSI() < -80) {
feedback.setFeedback("Weak Wi-Fi signal", dash::Status::WARNING);
} else {
feedback.setFeedback("System ready", dash::Status::SUCCESS);
}
dashboard.sendUpdates();
delay(3000);
}
```
## Notes
- With `T = const char*`, the card stores the pointer and does not copy the string. Pass string literals or buffers that outlive the card. Use `dash::string` for messages built at runtime.
# File Upload Card (/docs/espdash/v5/cards/file-upload)
> Let users upload a file from the browser to an HTTP endpoint on the device, with progress and result indication.
Library: ESP-DASH v5.x.x
Availability: ESP-DASH Pro only
The file upload card lets the user select a file in the browser and upload it to an HTTP endpoint on the device. The card shows upload progress and whether the upload succeeded. Use it to transfer configuration files, data files or other assets to the device.
## Constructor
```cpp
template
dash::FileUploadCard(ESPDash& dashboard, const char* name, const char* extensions = "");
```
### Template parameters
### Parameters
```cpp
dash::FileUploadCard<> fileUpload(dashboard, "Upload", ".txt");
```
An overload without the `dashboard` argument creates the card without attaching it to a dashboard; attach it later with `dashboard.add(card)`.
## How uploads work
The card does not receive file data itself and has no callback. When the user selects a file, the browser sends it to the URL set with `setValue()`:
- One file is uploaded per selection.
- The request is an HTTP `POST` with a `multipart/form-data` body; the file is in the form field named `file`.
- The card shows a success indicator if the endpoint responds with status `200`, and an error indicator for any other status.
You must register a handler for the upload URL on the `AsyncWebServer` instance and process the incoming data there, for example by writing it to a file system. See the [example](#example) below.
## Methods
### `setValue()`
```cpp
bool setValue(T url);
```
Sets the URL the file is uploaded to. Returns `true` if the value changed.
```cpp
fileUpload.setValue("/upload");
```
### `value()`
```cpp
const T& value() const;
```
Returns the current upload URL.
### `setExtensions()`
```cpp
bool setExtensions(const char* extensions);
```
Sets the file types offered in the browser's file selection dialog, as a comma-separated list of file extensions or MIME types. Returns `true` if the value changed.
```cpp
fileUpload.setExtensions(".txt,.jpg");
```
### `extensions()`
```cpp
const char* extensions() const;
```
Returns the current list of accepted file extensions or MIME types.
## Example
```cpp title="main.cpp"
#include
#include
#include
#include
#include
AsyncWebServer server(80);
ESPDash dashboard(server);
dash::FileUploadCard<> fileUpload(dashboard, "Upload", ".txt");
void setup() {
Serial.begin(115200);
// ... connect to WiFi
fileUpload.setValue("/upload");
// Handle the upload request sent by the card
server.on(
"/upload",
HTTP_POST,
[](AsyncWebServerRequest* request) {
// Called once the upload is complete; status 200 marks it as successful
request->send(200);
},
[](AsyncWebServerRequest* request, String filename, size_t index, uint8_t* data, size_t len, bool final) {
if (index == 0) {
Serial.printf("Upload start: %s\n", filename.c_str());
// ... open the destination file
}
// ... write `len` bytes from `data`
if (final) {
Serial.printf("Upload end: %s, %u bytes\n", filename.c_str(), (unsigned)(index + len));
// ... close the destination file
}
});
server.begin();
}
void loop() {
// ...
}
```
## Notes
- The file type filter applies only to the browser's selection dialog. Validate the file name, type and size in your upload handler.
- The card stores the `extensions` pointer and does not copy the string. Pass a string literal or a buffer that remains valid for the lifetime of the card.
# Generic Card (/docs/espdash/v5/cards/generic)
> Display a numeric or text value with an optional symbol using dash::GenericCard.
Library: ESP-DASH v5.x.x
The generic card displays a single value of any supported type together with an optional symbol or unit. Use it for counters, status strings and other values that no dedicated card covers.
## Constructor
```cpp
dash::GenericCard card(dashboard, name, symbol);
```
Template parameters:
```cpp
dash::GenericCard restarts(dashboard, "Restarts", "times");
dash::GenericCard energy(dashboard, "Energy", "kWh");
dash::GenericCard status(dashboard, "Status"); // dash::string
```
An overload without the `dashboard` argument creates the card without attaching it to a dashboard; attach it later with `dashboard.add(card)`.
## Methods
### `setValue()`
```cpp
bool setValue(const T& value);
```
Sets the displayed value. Returns `true` if the value changed and an update is pending, `false` if the new value equals the current one.
### `value()`
```cpp
const T& value() const;
```
Returns the current value. Call it only when `hasValue()` returns `true`.
### `hasValue()`
```cpp
bool hasValue() const;
```
Returns `true` if a value has been set.
### `removeValue()`
```cpp
bool removeValue();
```
Clears the value. The dashboard then shows `0` for numeric types or an empty string for text types. Returns `true` if a value was removed.
### `setSymbol()`
```cpp
bool setSymbol(const char* symbol);
```
Sets the symbol or unit displayed next to the value. Returns `true` if the symbol changed.
### `symbol()`
```cpp
const char* symbol() const;
```
Returns the current symbol.
## Example
```cpp title="main.cpp"
#include
#include // ESP32; use the networking headers for your board
#include
#include
#include
AsyncWebServer server(80);
ESPDash dashboard(server);
dash::GenericCard counter(dashboard, "Counter", "events");
int events = 0;
void setup() {
// ... connect to Wi-Fi
server.begin();
}
void loop() {
counter.setValue(++events);
dashboard.sendUpdates();
delay(3000);
}
```
## Notes
- The card stores the `symbol` pointer and does not copy the string. Pass a string literal or a buffer that outlives the card.
- `dash::string` is Arduino `String` by default, or `std::string` when `DASH_USE_STL_STRING` is defined.
# Humidity Card (/docs/espdash/v5/cards/humidity)
> Display a relative humidity reading with a configurable unit using dash::HumidityCard.
Library: ESP-DASH v5.x.x
The humidity card displays a numeric humidity reading, by default as a percentage, such as the output of a DHT22 or BME280 sensor.
## Constructor
```cpp
dash::HumidityCard card(dashboard, name, unit);
```
Template parameters:
```cpp
dash::HumidityCard humidity(dashboard, "Humidity"); // float, 2 decimals, %
dash::HumidityCard greenhouse(dashboard, "Greenhouse");
dash::HumidityCard room(dashboard, "Room");
```
An overload without the `dashboard` argument creates the card without attaching it to a dashboard; attach it later with `dashboard.add(card)`.
## Methods
### `setValue()`
```cpp
bool setValue(const T& value);
```
Sets the humidity value. Returns `true` if the value changed and an update is pending.
### `value()`
```cpp
const T& value() const;
```
Returns the current value. Call it only when `hasValue()` returns `true`.
### `hasValue()`
```cpp
bool hasValue() const;
```
Returns `true` if a value has been set.
### `removeValue()`
```cpp
bool removeValue();
```
Clears the value. The dashboard then shows `0`. Returns `true` if a value was removed.
### `setUnit()`
```cpp
bool setUnit(const char* unit);
```
Sets the unit displayed next to the value. Returns `true` if the unit changed.
### `unit()`
```cpp
const char* unit() const;
```
Returns the current unit.
## Example
```cpp title="main.cpp"
#include
#include // ESP32; use the networking headers for your board
#include